

Deploy on Your Own Server
You can run Odoo on a server in your own Amazon Web Services (AWS) account, instead of on Easy Instance's servers. Easy Instance sets the server up and manages Odoo on it; AWS bills the server to your account.
This option is for teams that already use AWS, or need their data in a particular AWS region. You'll need someone who can create AWS logins and keys. If you're new to the terms, see the Glossary.
Your first one is free
Your first instance on your own server is free, with no subscription key needed. Further instances on your own server each need a subscription key.
Before You Start
- An AWS account, and an IAM user (a separate login in that account) that is only allowed to manage EC2 servers. You need its Access key ID and Secret access key.
- To use a server you already run: an Ubuntu EC2 server you can log in to with an SSH key, as a user that can run admin commands without a password (
ubuntuon standard images), plus that user's SSH private key file.
Start the Wizard
- Go to Instances and select New Project.
- Choose Deploy on your own server.
- In Name your instance, enter an Instance name, pick the Odoo version and edition, and select Continue to server.
Choose Your Server
Pick one of two options.
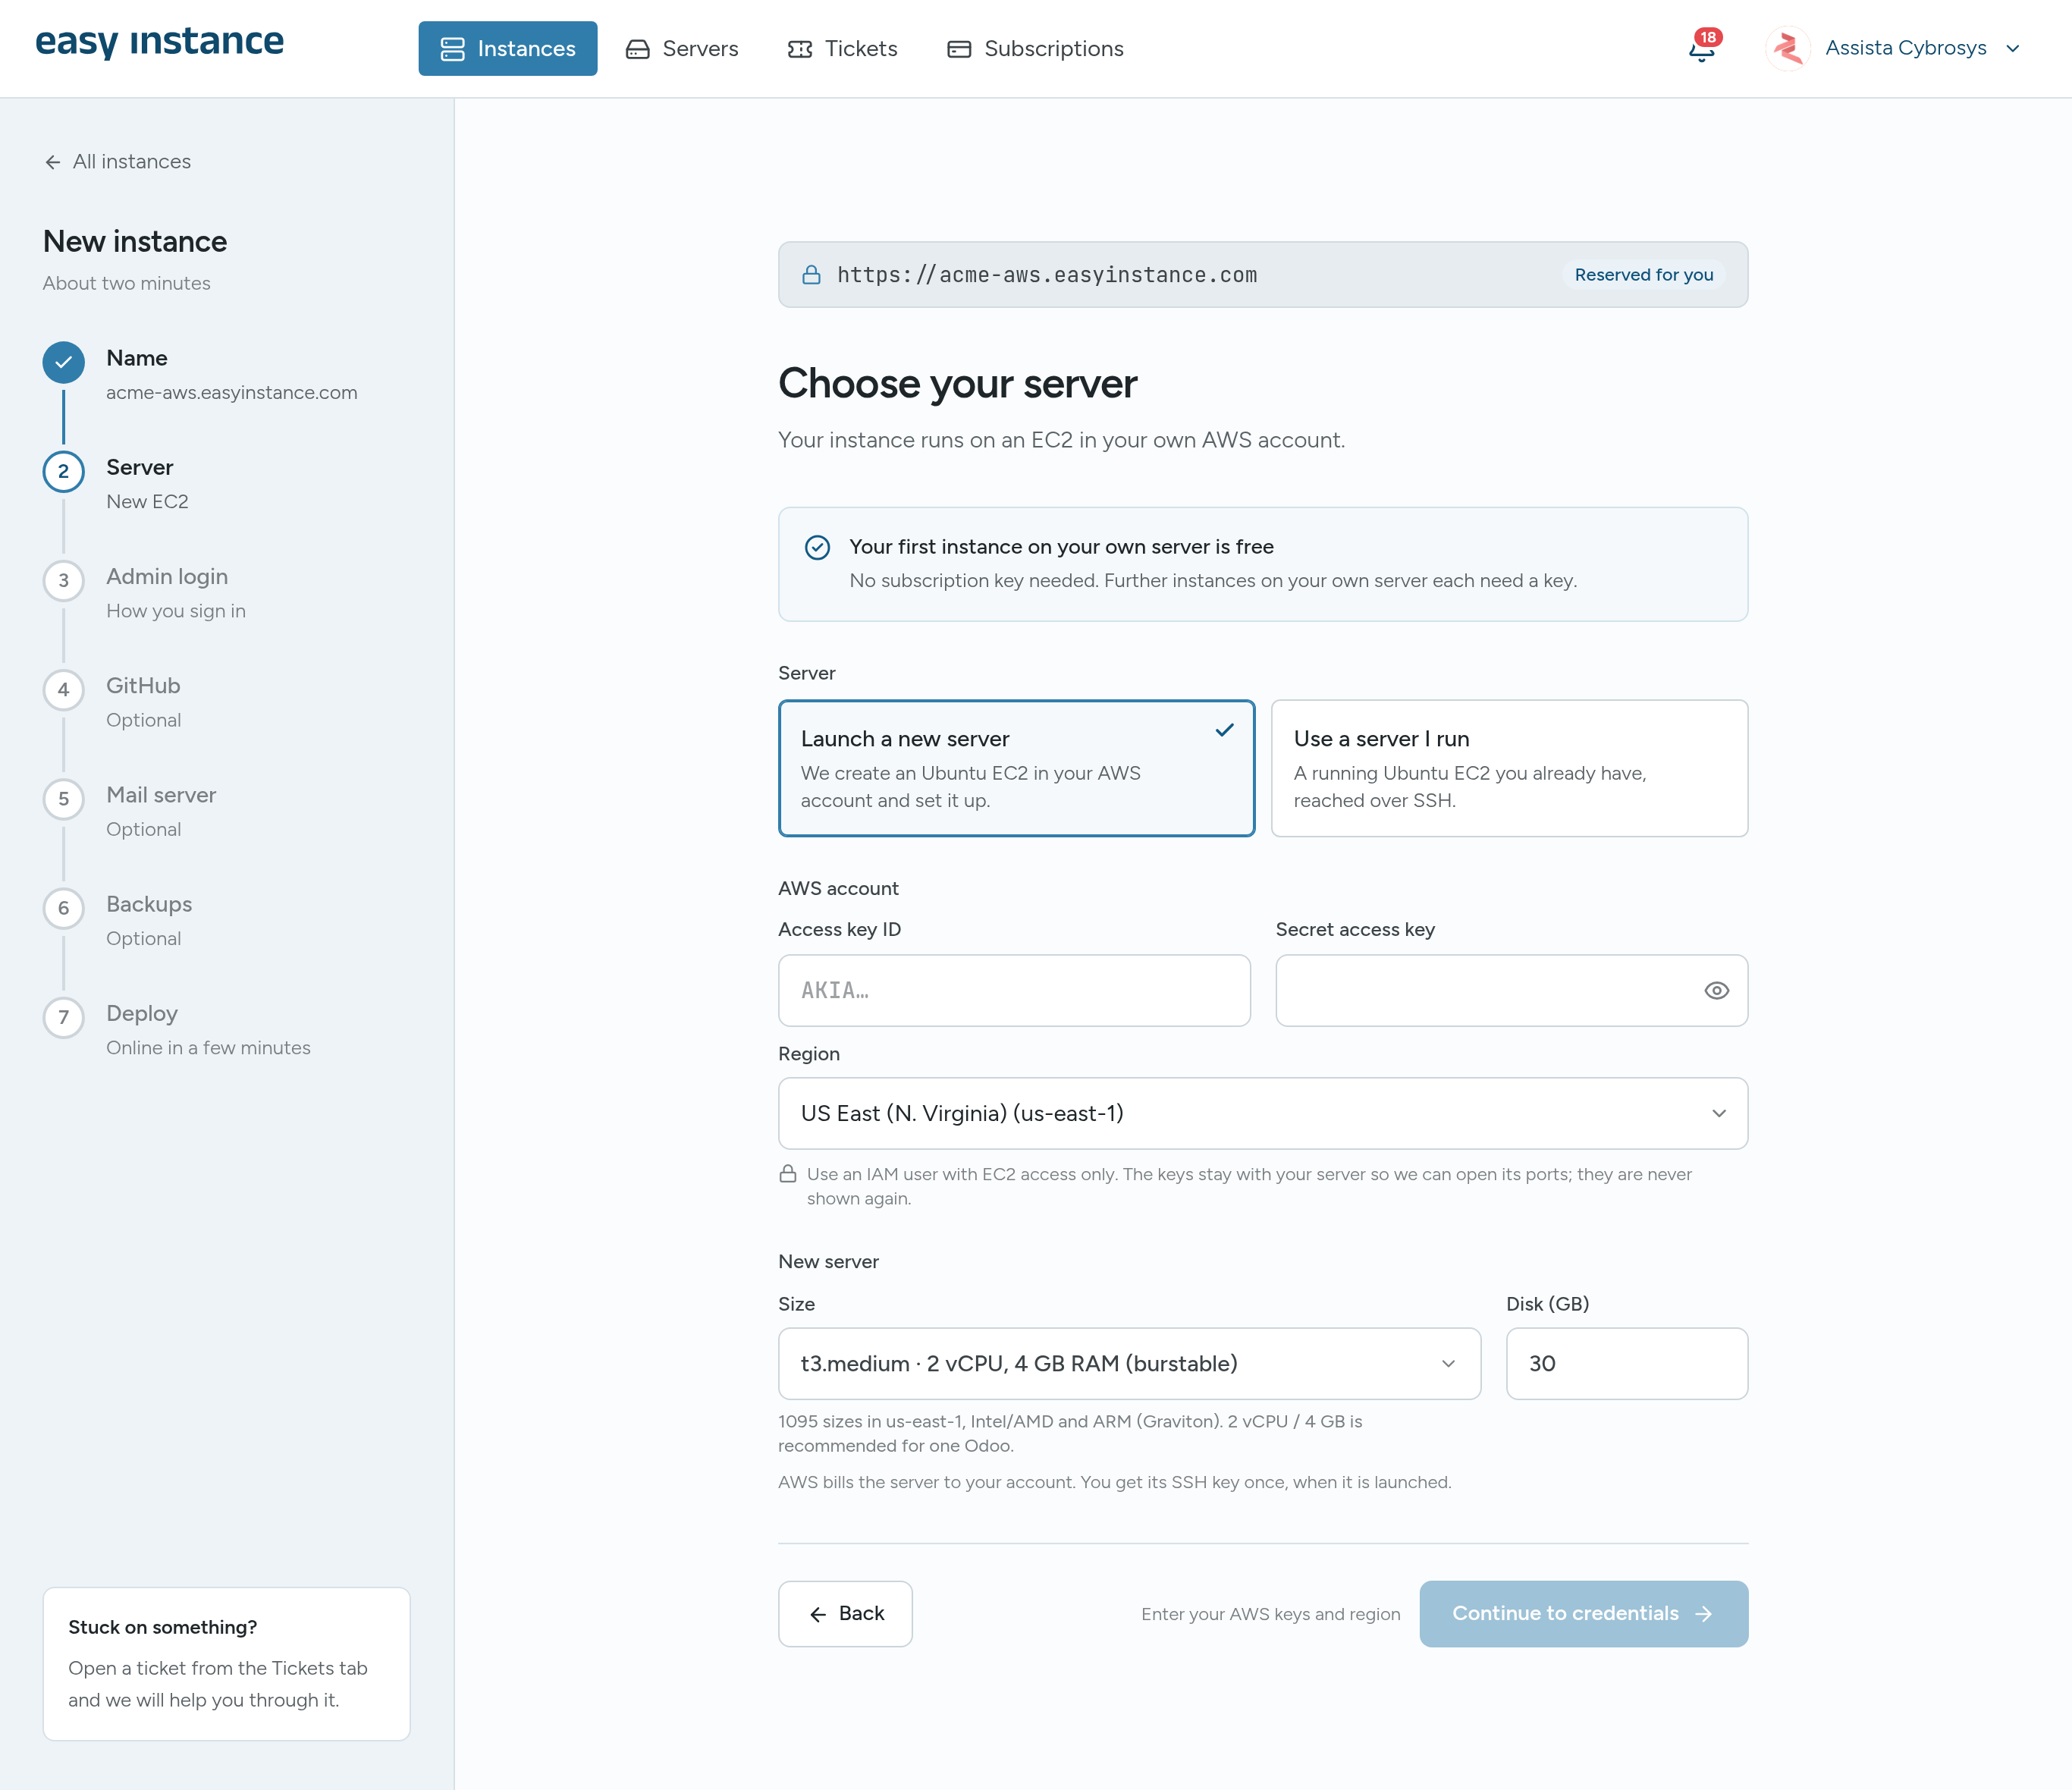
Launch a New Server
Easy Instance creates an Ubuntu EC2 in your AWS account and sets it up.
- Enter the Access key ID and Secret access key, and choose the Region. The keys stay with your server so Easy Instance can open its ports; they are never shown again.
- Under New server, choose a Size. 2 vCPU / 4 GB (t3.medium) is recommended for one Odoo.
- Set the Disk (GB).
- Select Continue to credentials.
Save the SSH key
After the server is launched, the deploy screen offers Download .pem. You get the server's SSH key only once, so download it and keep it safe.
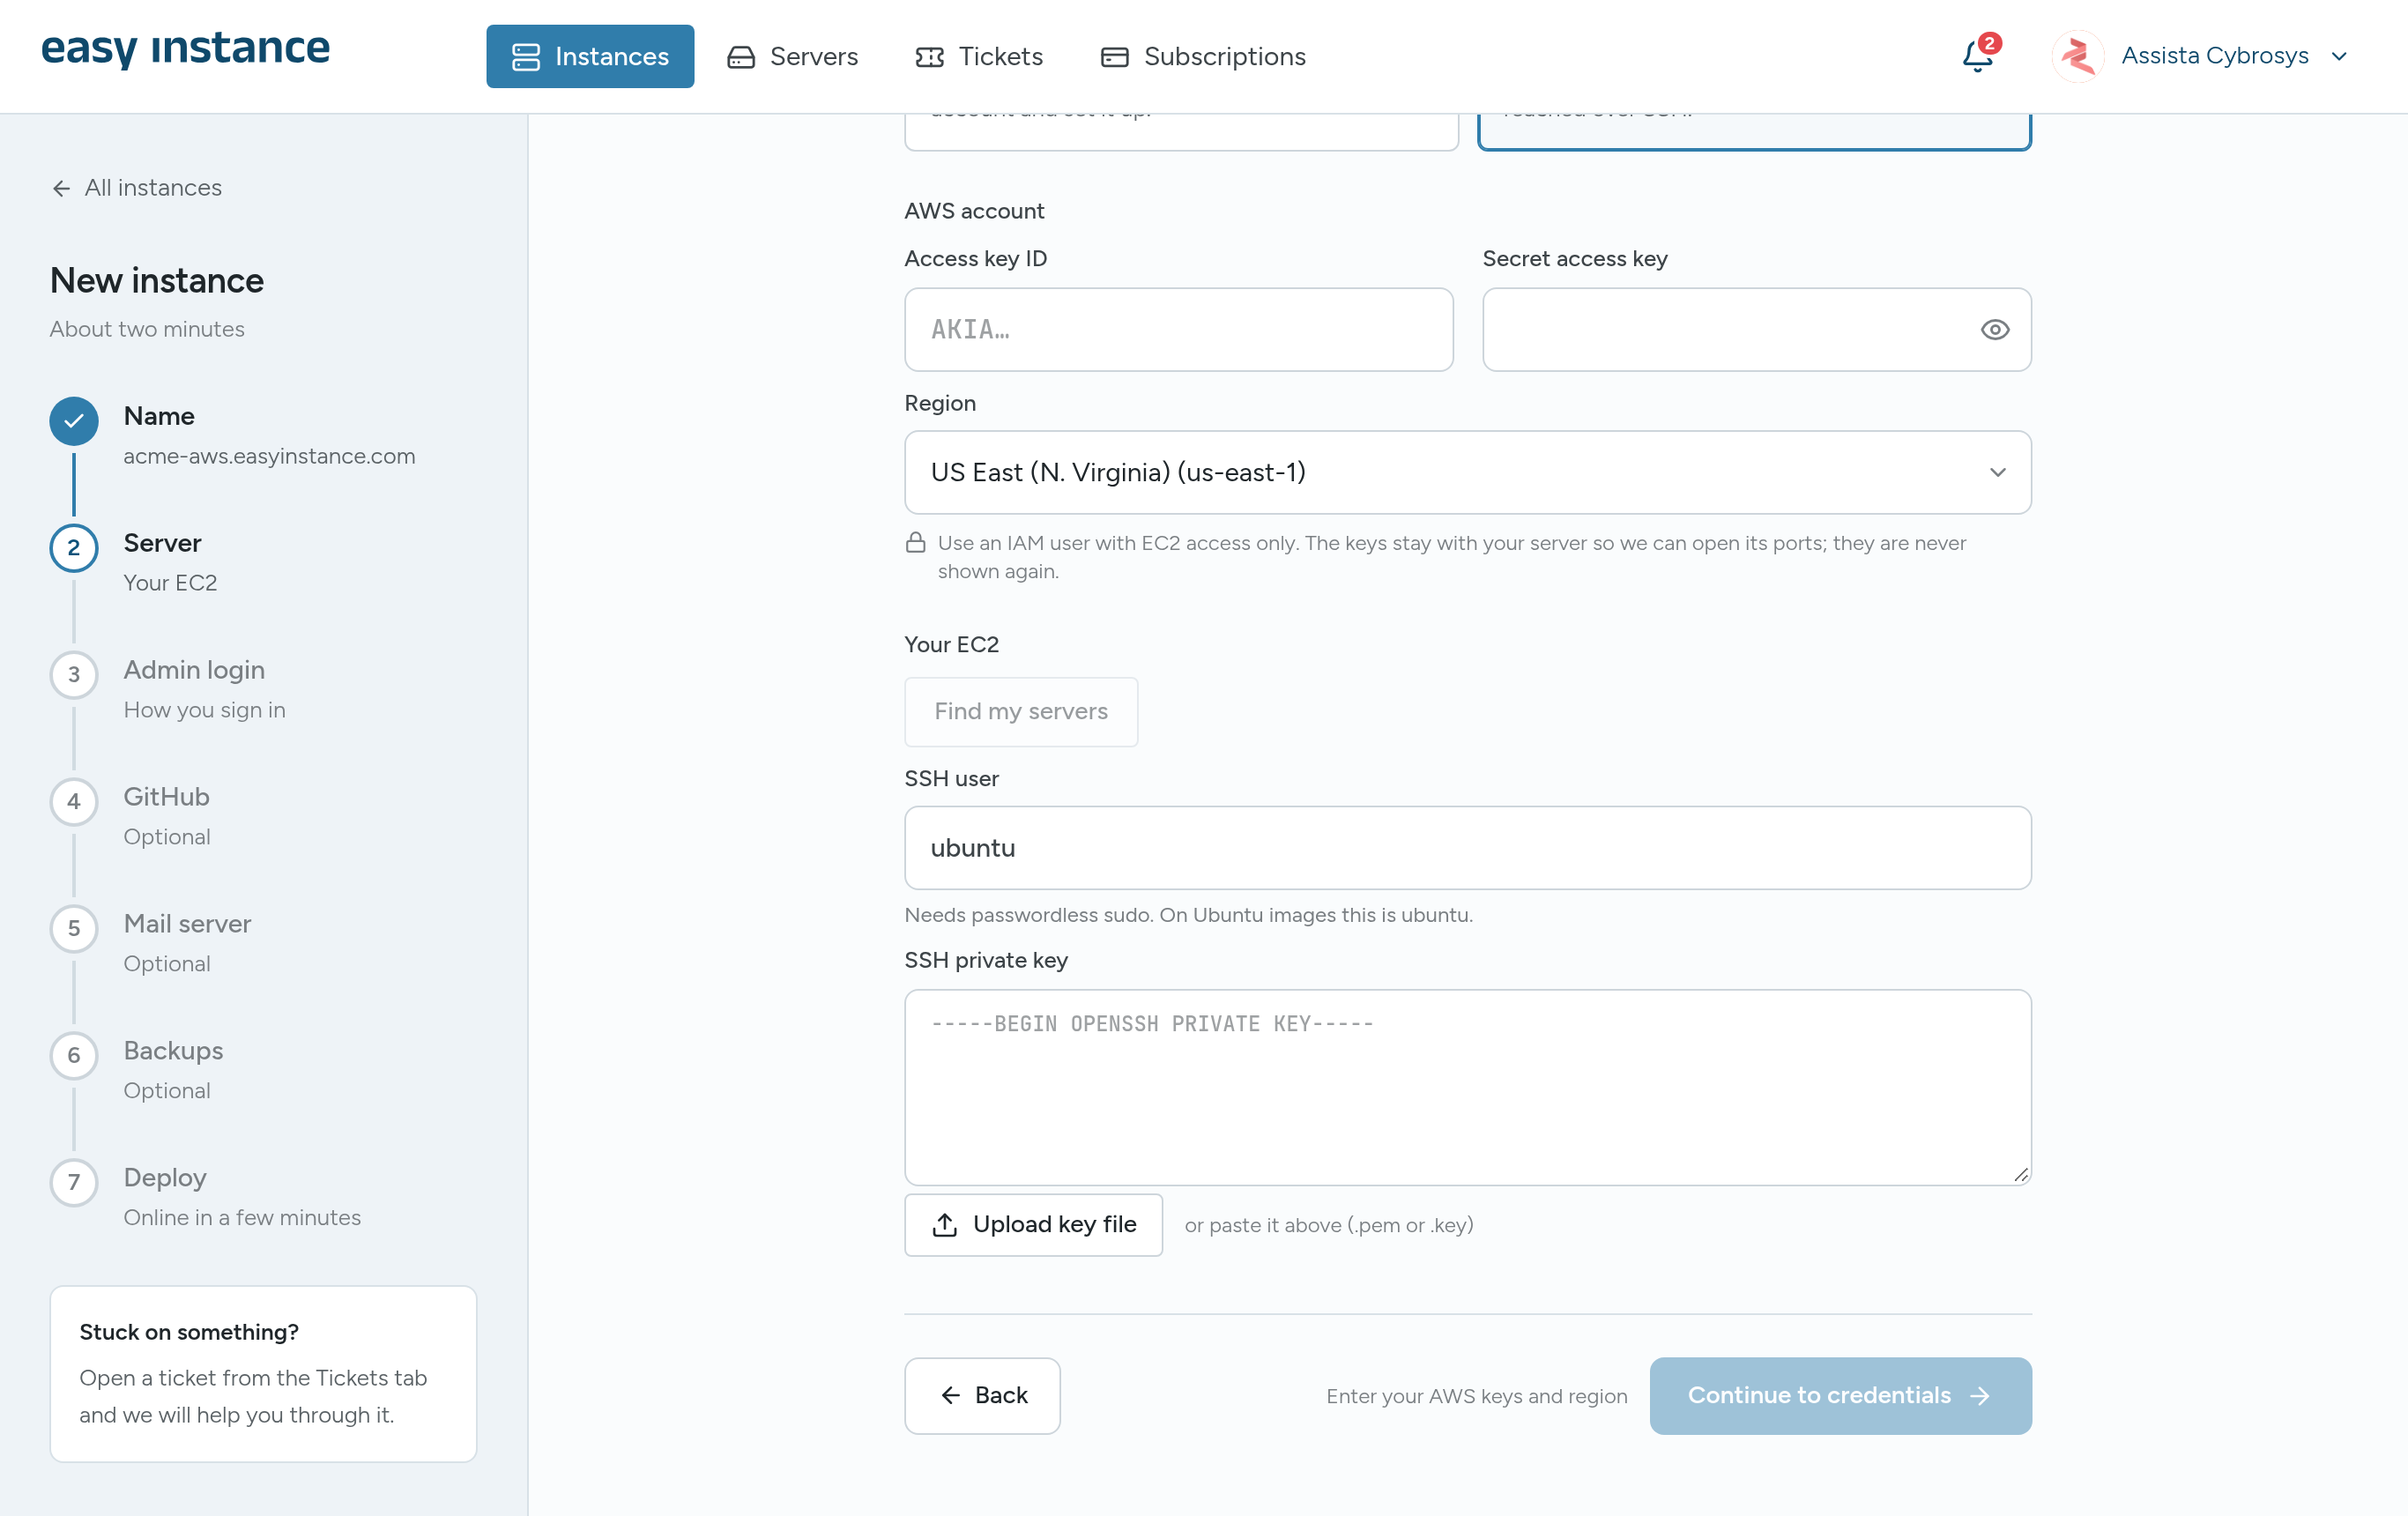
Use a Server I Run
- Enter the Access key ID, Secret access key and Region.
- Under Your EC2, select Find my servers and pick your server.
- Check the SSH user. On Ubuntu images this is
ubuntu. - Paste the SSH private key, or select Upload key file (.pem or .key).
- Select Continue to credentials.
Finish and Deploy
The remaining steps are the same as a new instance: Admin login, GitHub, Mail server, Backups and Deploy. See Create an Instance.
Setting up a new server adds a Setting up your server step to the deploy progress. It takes 5 to 15 minutes.
Subscription Keys
For a second or later instance on your own server, the wizard asks for a 15-character subscription key. Select Buy monthly or Buy yearly to get one, then Refresh to load it.
- Keys you've bought but not used yet are listed under Your unused keys. Pick one to use it.
- If you bought a key but haven't paid yet, select Pay the invoice to finish paying, then Refresh.
The Servers Page
Servers in the top bar lists the servers you have connected, with their status, AWS region, EC2 instance, public IP, who connected them and how many instances they run.
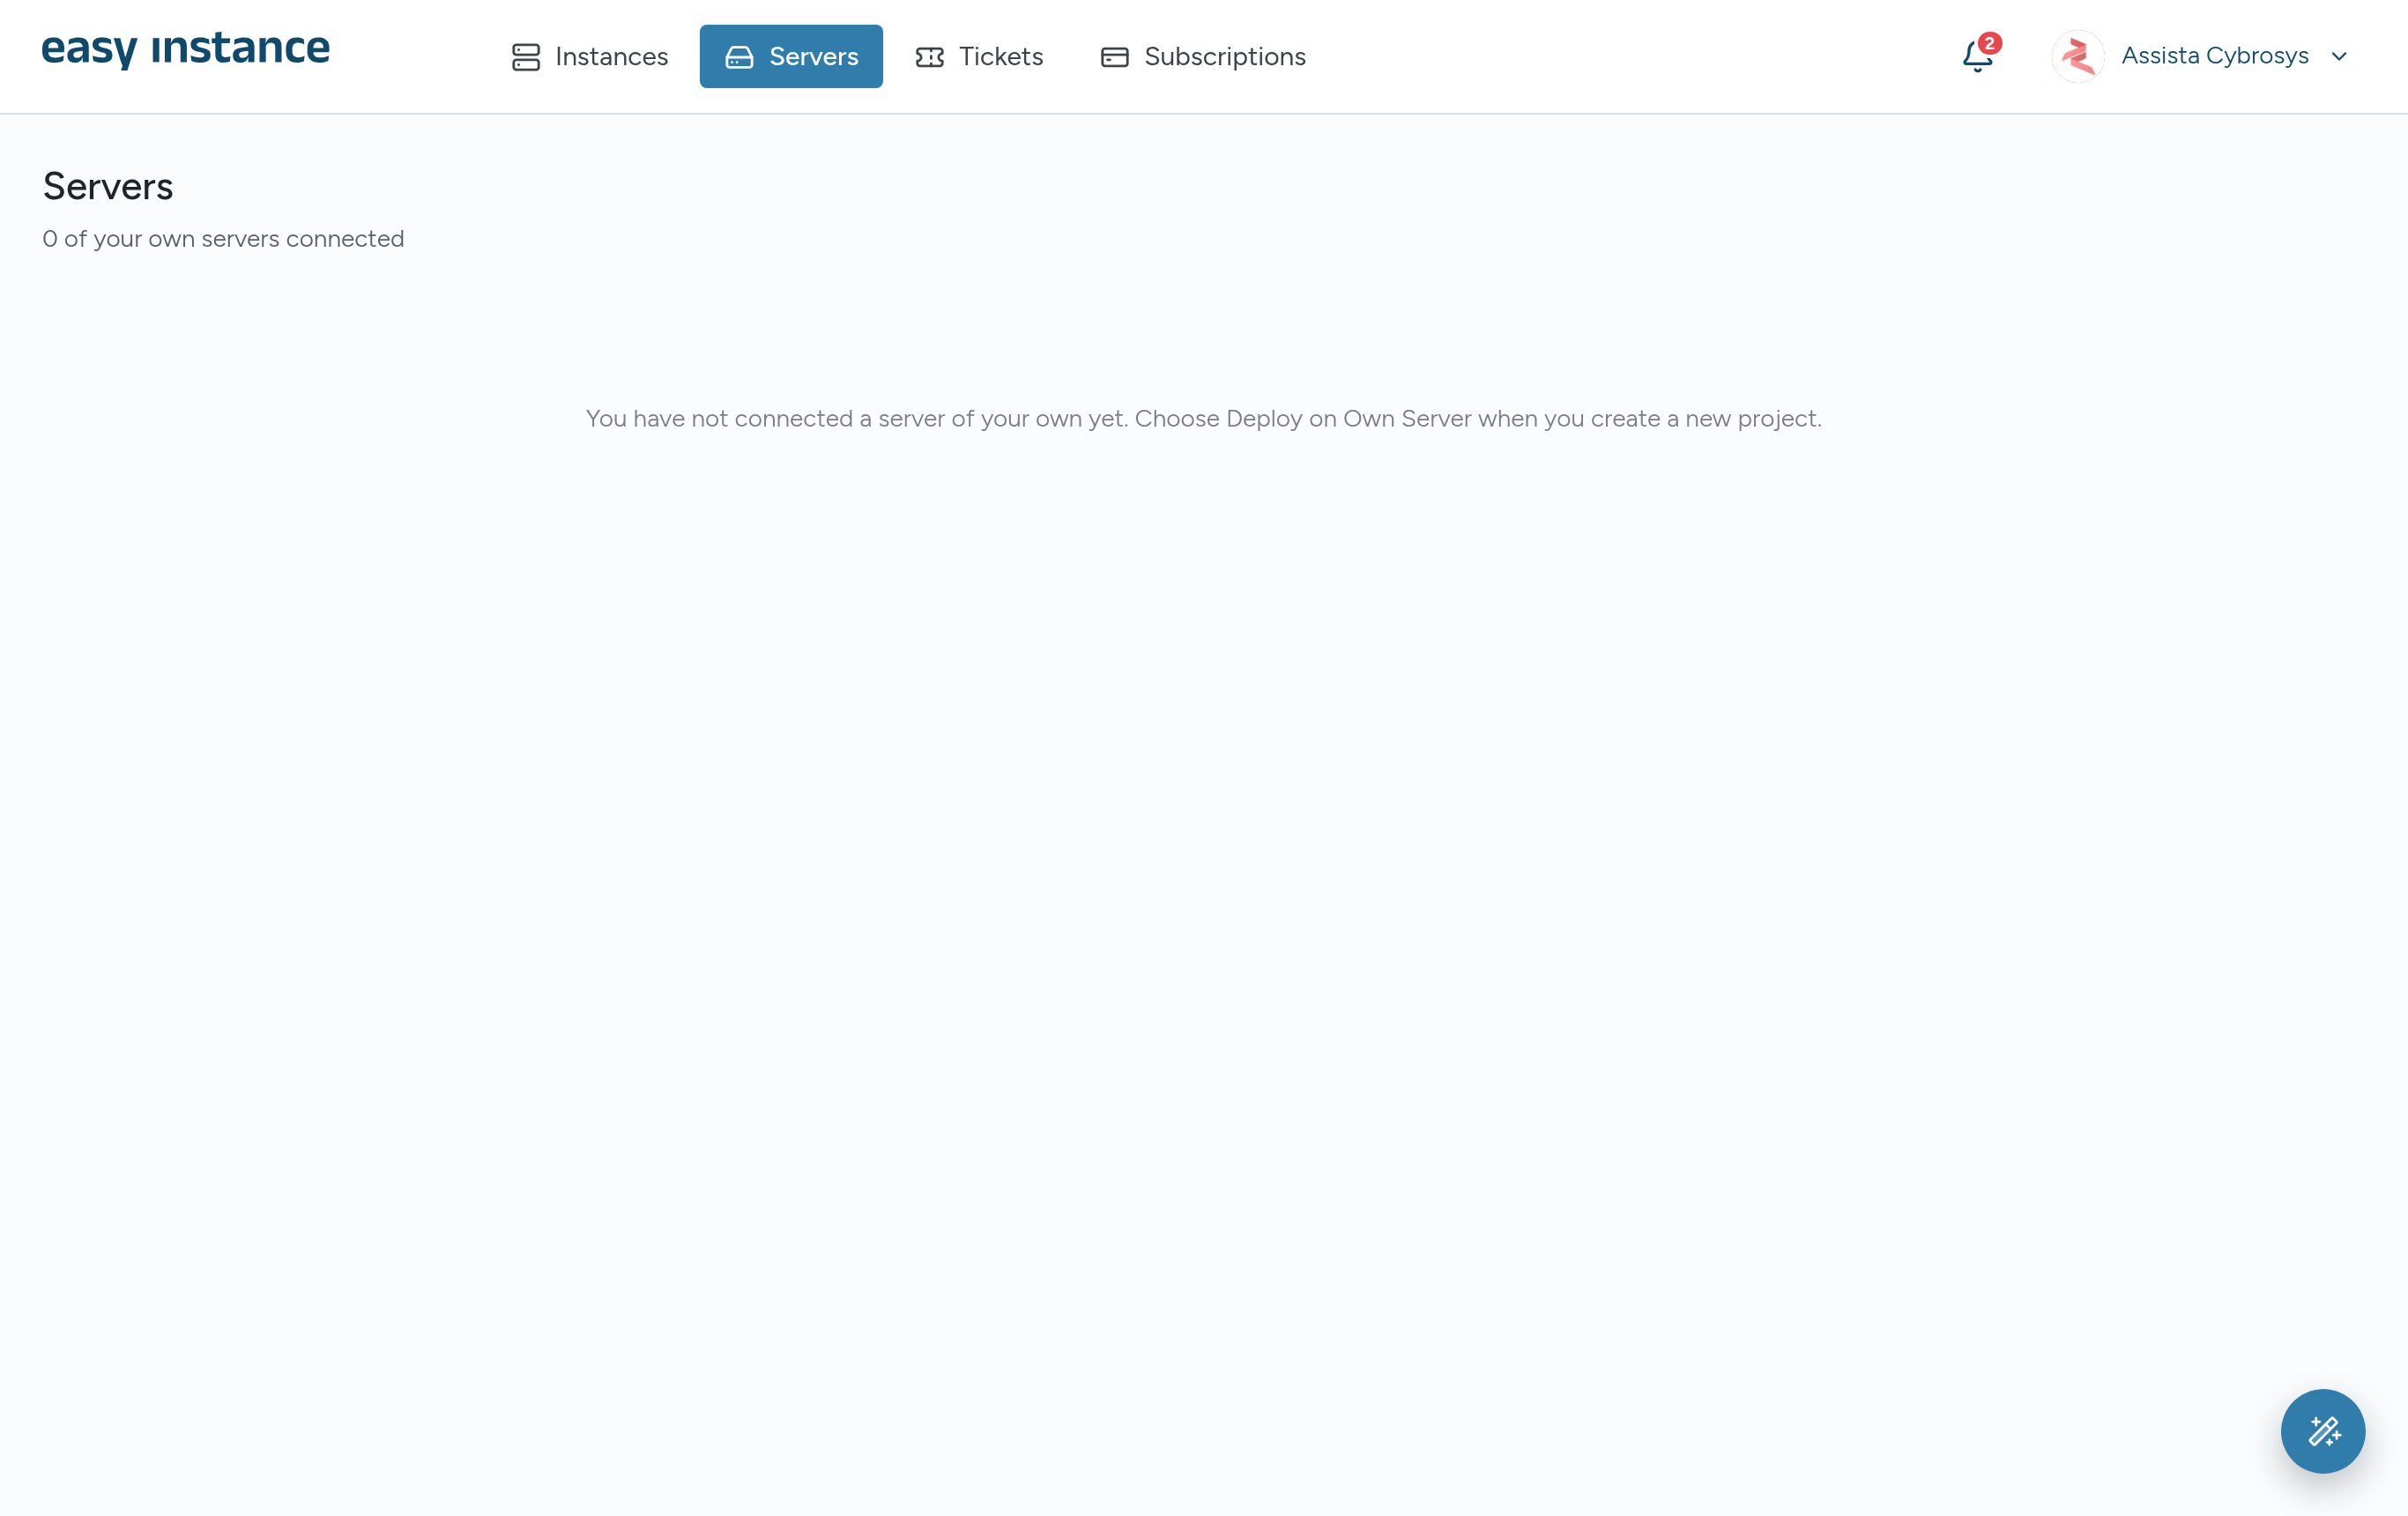
To remove a server, first delete the instances on it, then select Delete. This only detaches it from Easy Instance. The EC2 keeps running in your AWS account, so stop or terminate it in AWS if you no longer need it.