

Custom Domains
Every instance has a built-in address, such as my-company.easyinstance.com. You can also use your own web address, such as erp.example.com. Easy Instance sets up SSL (the padlock and https) for it automatically.
To connect a domain, you add one DNS record where you manage your domain, for example at GoDaddy, Namecheap or Cloudflare. This record, called a CNAME, points your domain to your instance.
Add a Domain
Open the instance and select Settings, then Domains.
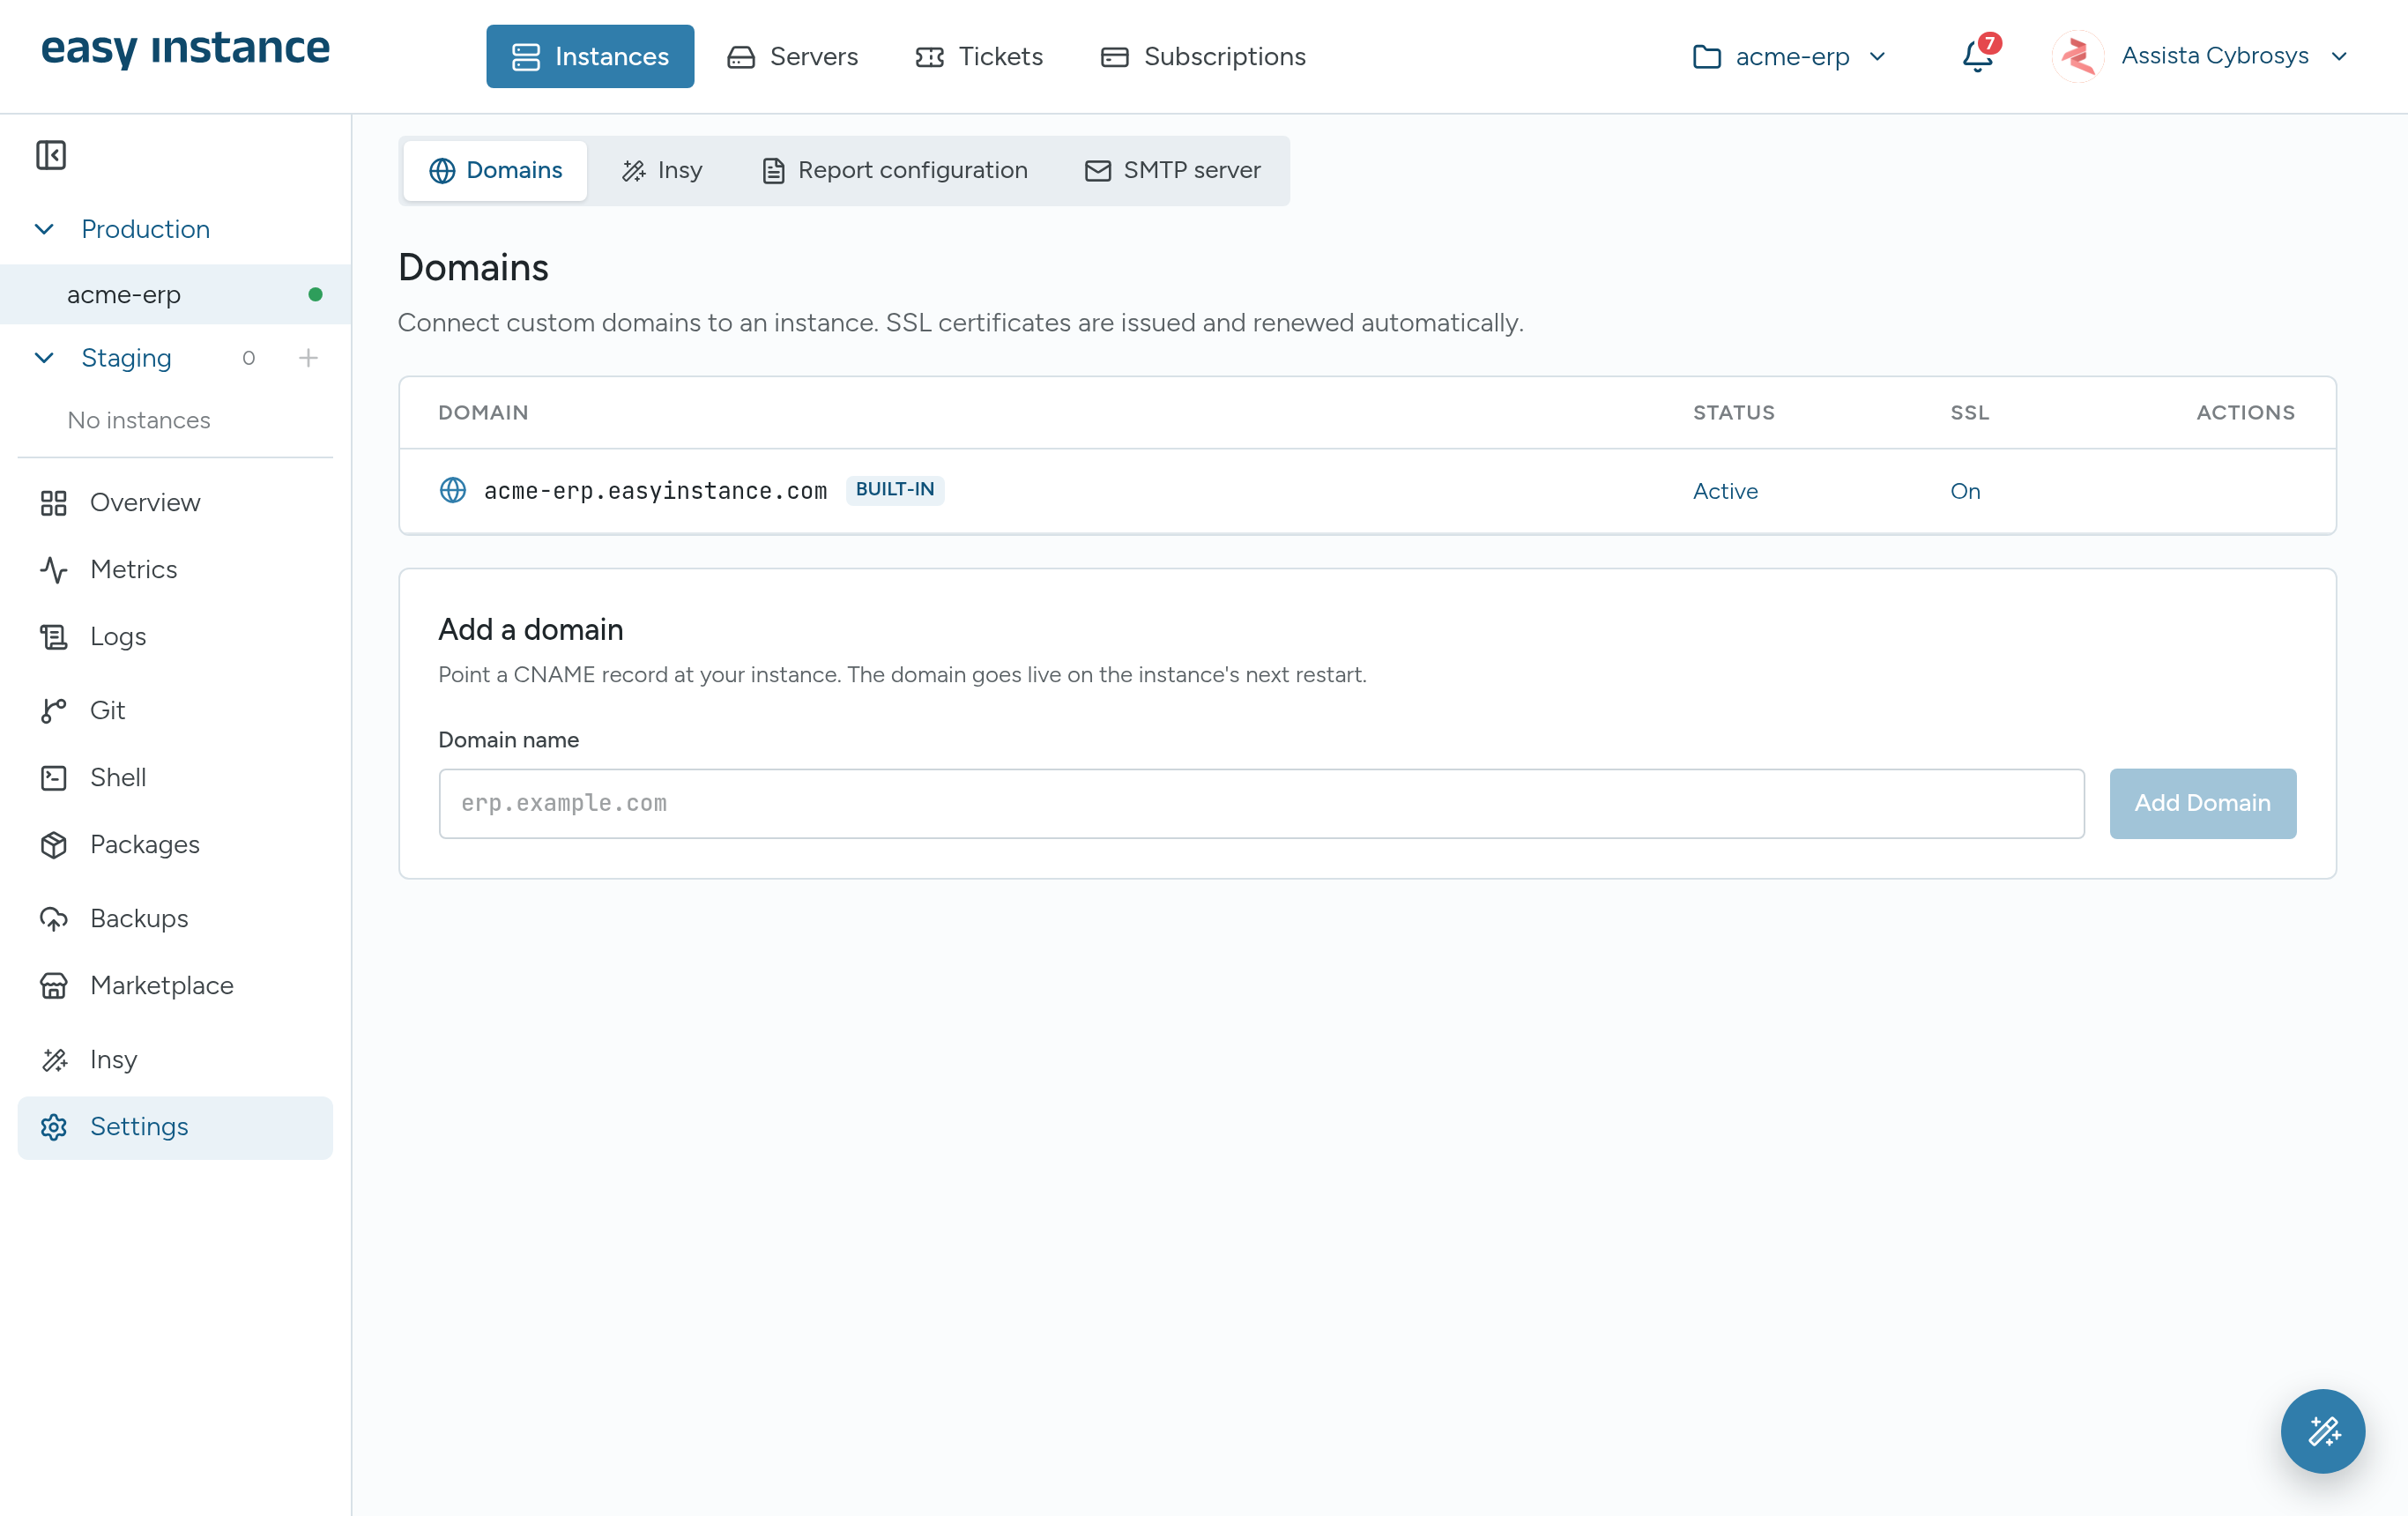
Under Add a domain, type the Domain name. As you type, DNS RECORD TO ADD shows the exact record to create: a CNAME from your domain to the instance's built-in address, with TTL 3600.
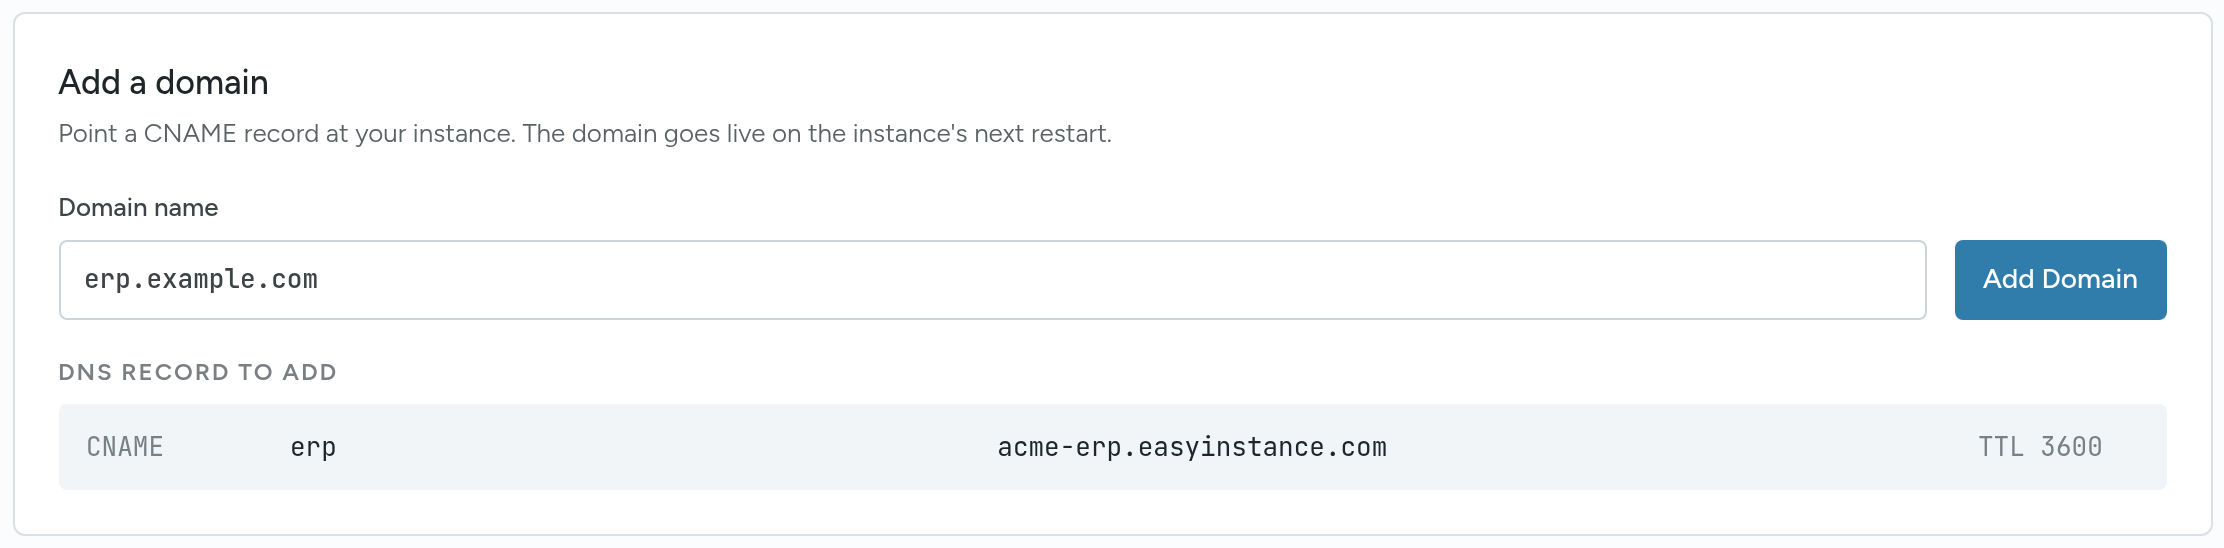
In your DNS provider, add that CNAME record.
Back in Easy Instance, select Add Domain.
The domain is listed with the status Pending and SSL After DNS until your DNS record is found.
INFO
The domain goes live on the instance's next restart. Once DNS is in place, restart the instance to bring it online sooner.
Domain Statuses
| Status | Meaning |
|---|---|
| Pending | Waiting for DNS or for the next restart |
| Active | The domain works and has an SSL certificate |
| Expired | The certificate has expired |
| Failed | The certificate could not be issued. Check the CNAME record |
You can connect several domains to one instance. Each gets its own certificate.
Remove a Domain
Select the trash button on the domain's row and confirm. The domain stops pointing at the instance. The built-in domain cannot be removed.