

Create an Instance
An instance is your own running copy of Odoo. The wizard to create one takes about two minutes, and the instance is online in under two minutes after you deploy. Only the first two steps are required; GitHub, mail server and backups can be set up later.
Free trials
Each new instance starts on a 10-day free trial. You can have up to 2 trial instances at a time. To start another, subscribe to one of them or delete one.
Start a New Project
- Go to Instances and select New Project.
- In Start a new project, choose Create a new instance.
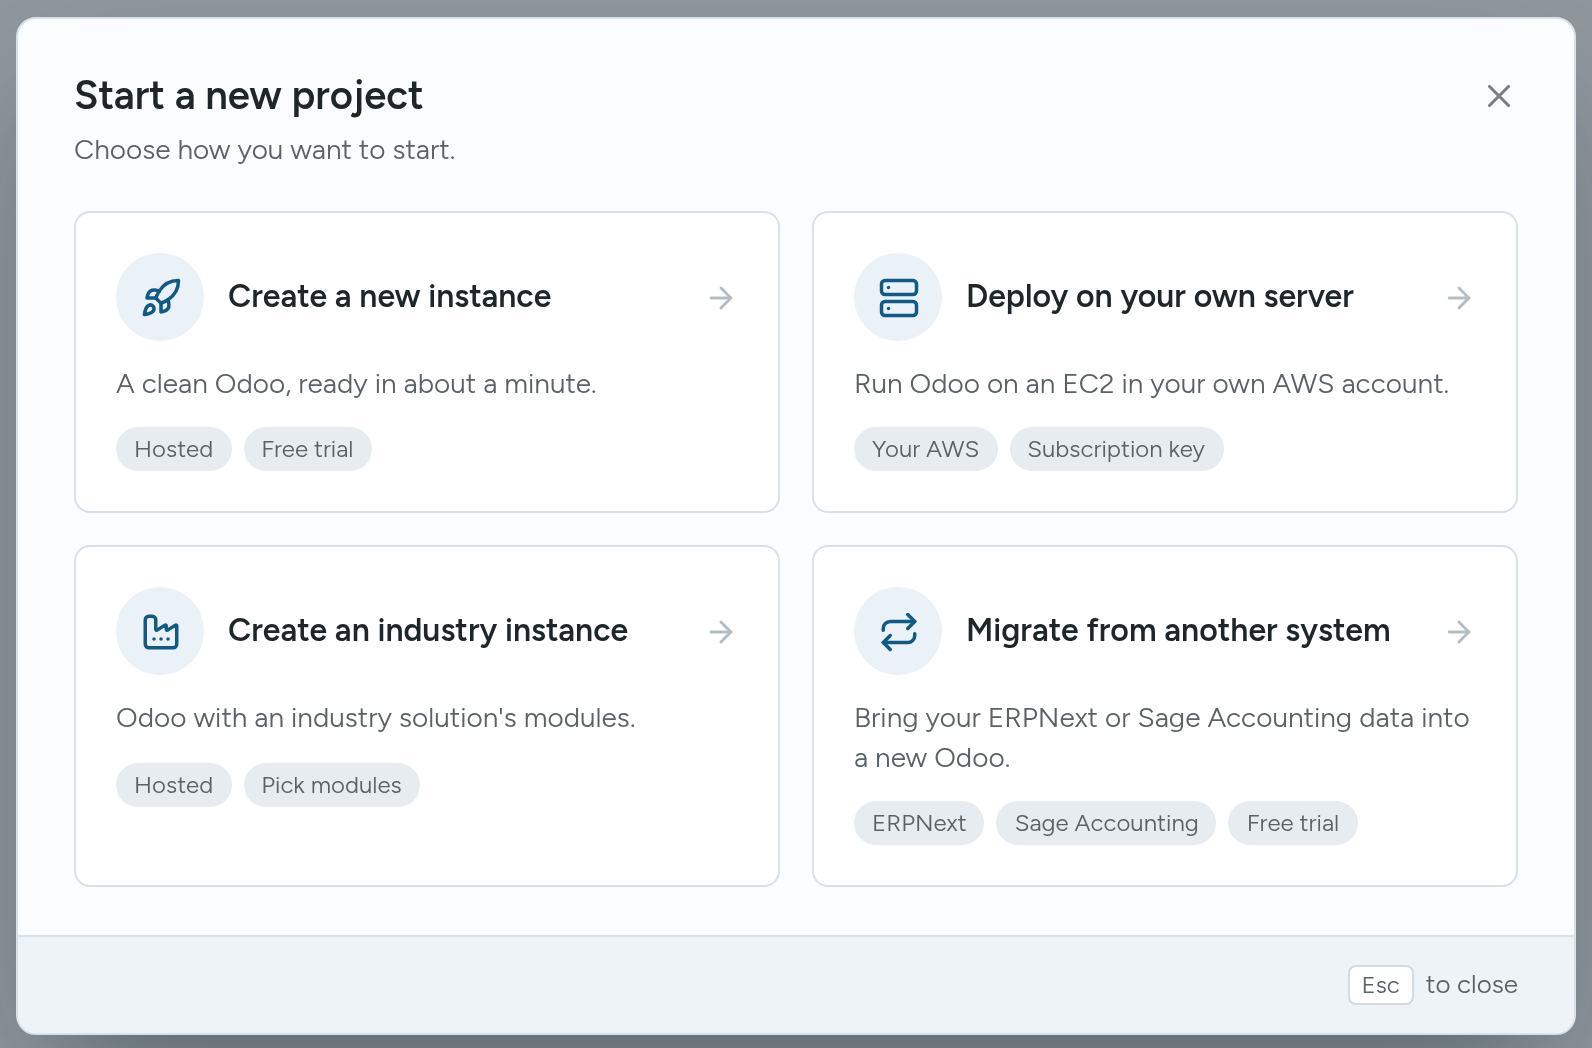
The other options have their own guides: Create an industry instance, Deploy on your own server and Migrate from another system.
Step 1: Choose Your Address
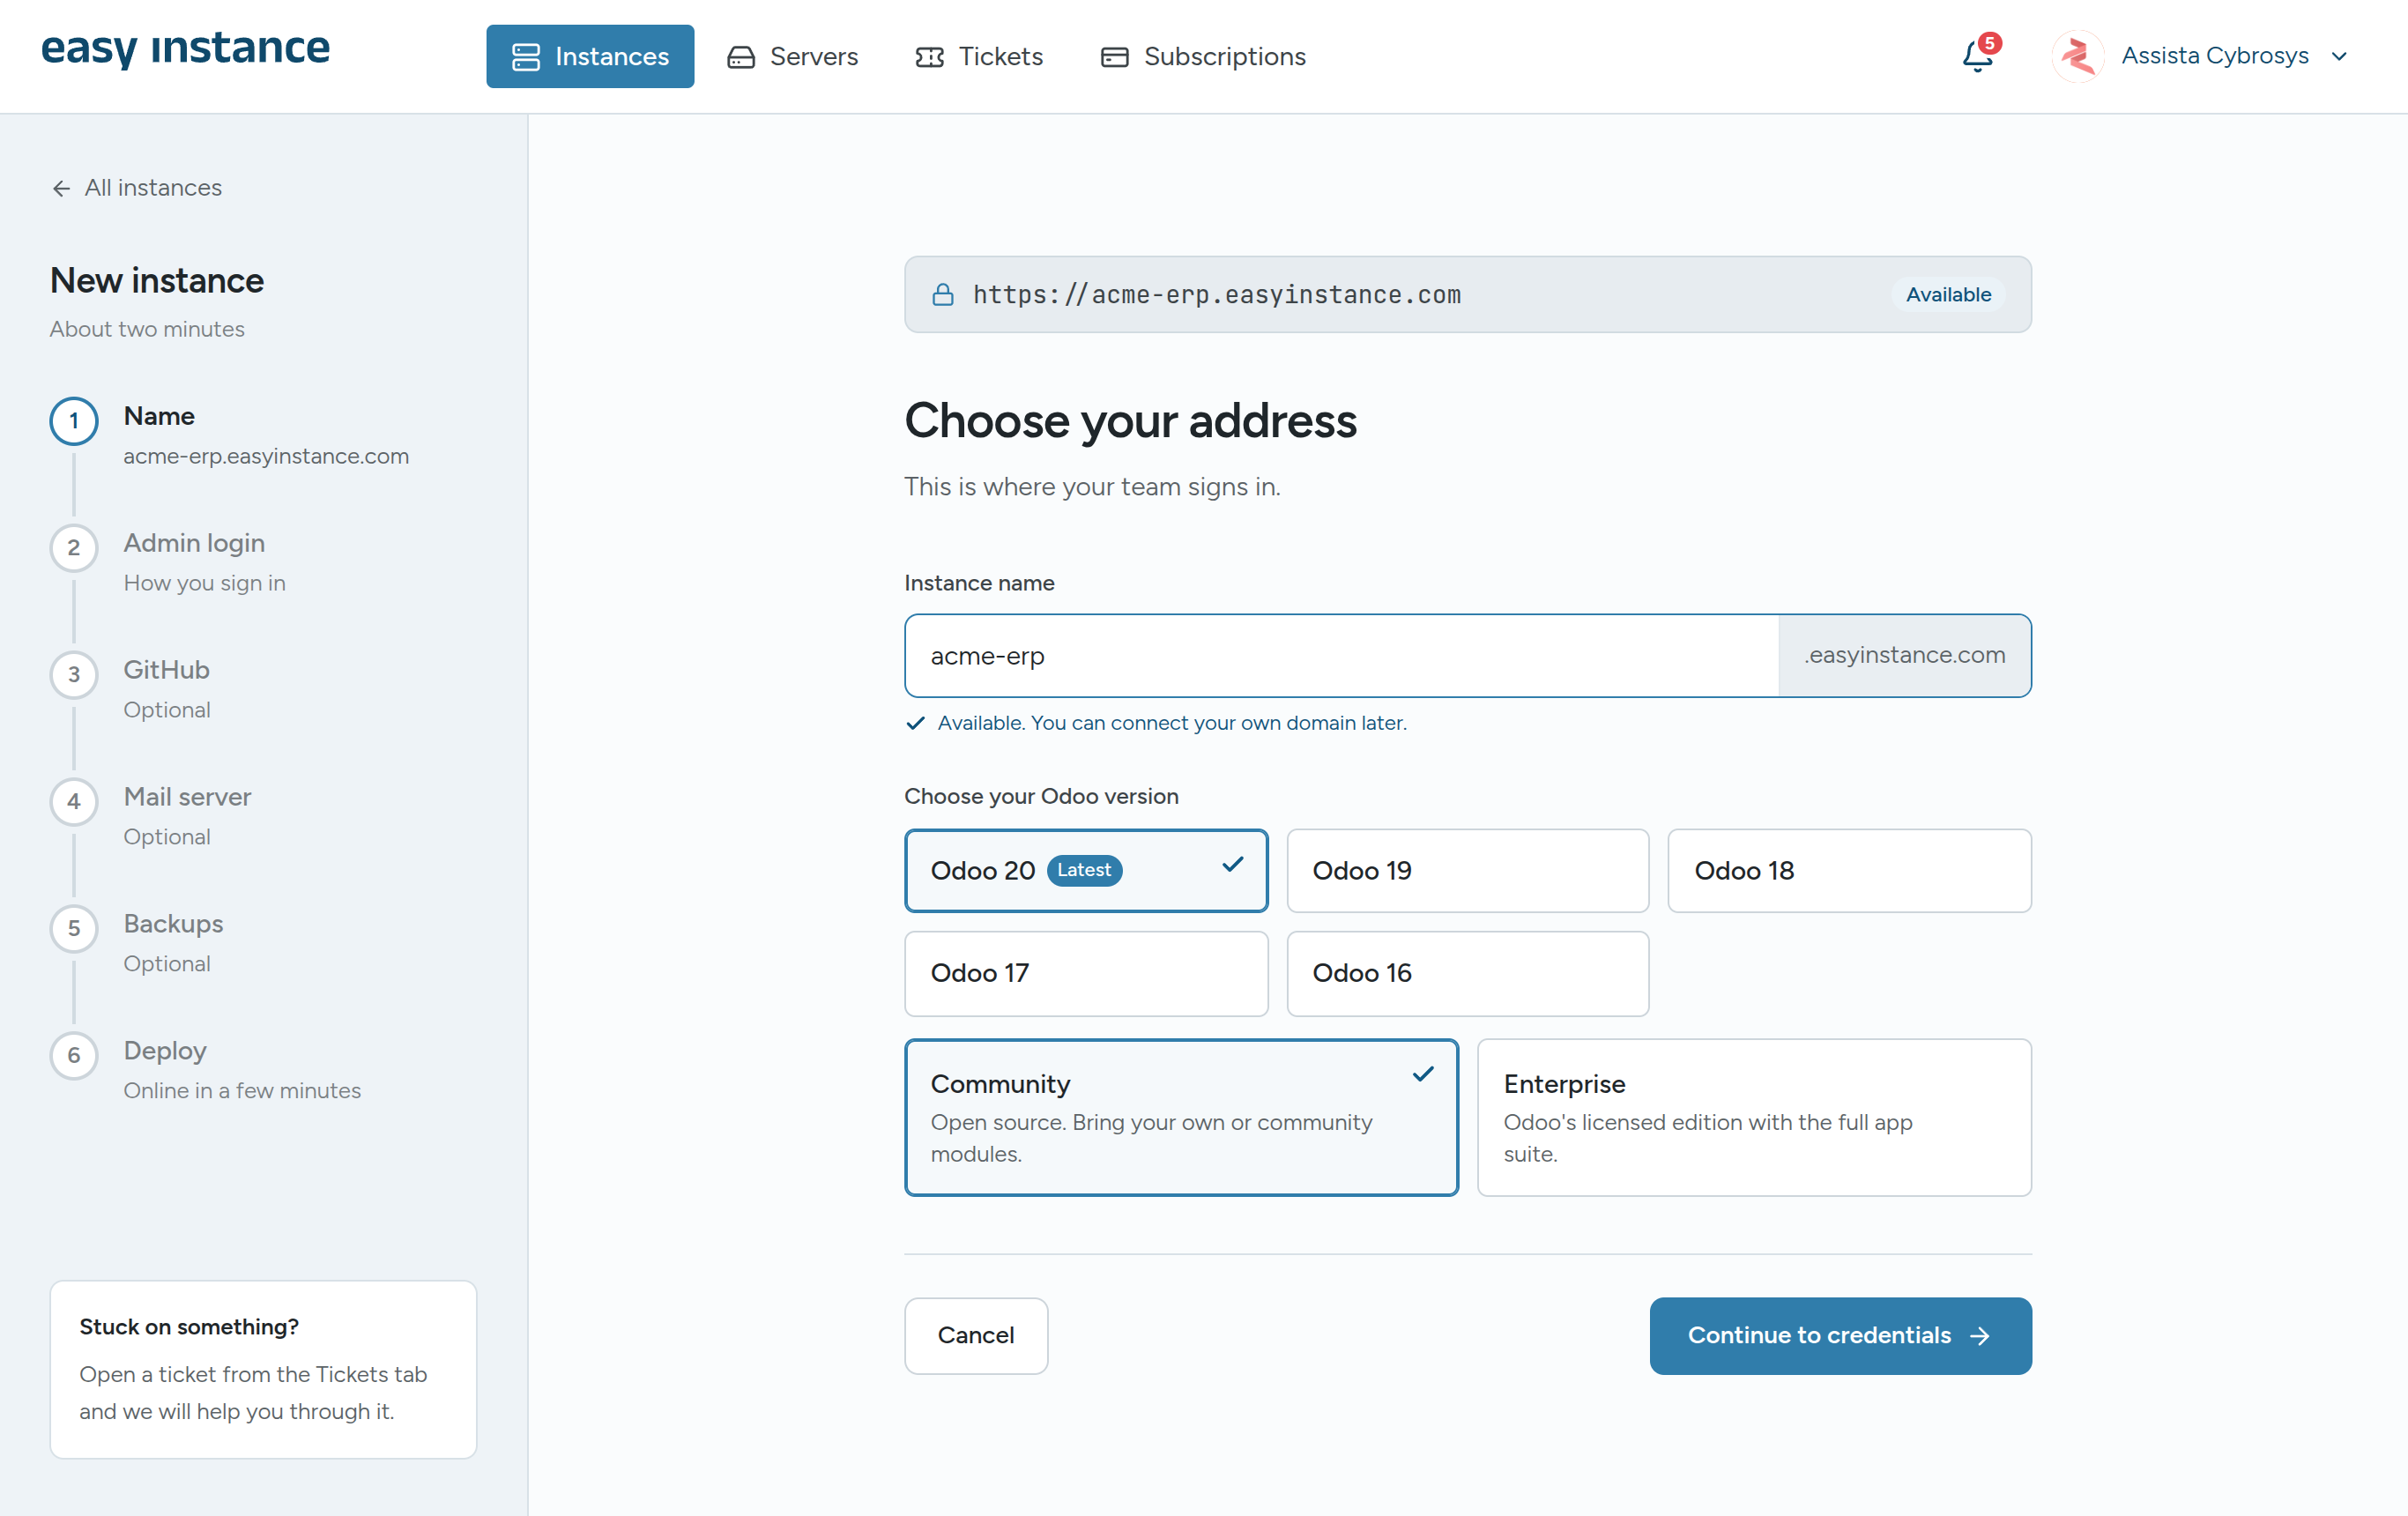
- Enter an Instance name. It becomes your address, for example
my-company.easyinstance.com.- Use 3 to 63 lowercase letters, numbers or hyphens, with no hyphen at the start or end.
- The name is checked as you type. Available. You can connect your own domain later. means you can use it.
- Under Choose your Odoo version, pick Odoo 20 (marked Latest), 19, 18, 17 or 16.
- Choose the edition:
- Community: open source. Bring your own or community modules.
- Enterprise: Odoo's licensed edition with the full app suite.
- Select Continue to credentials.
Step 2: Set the Admin Login
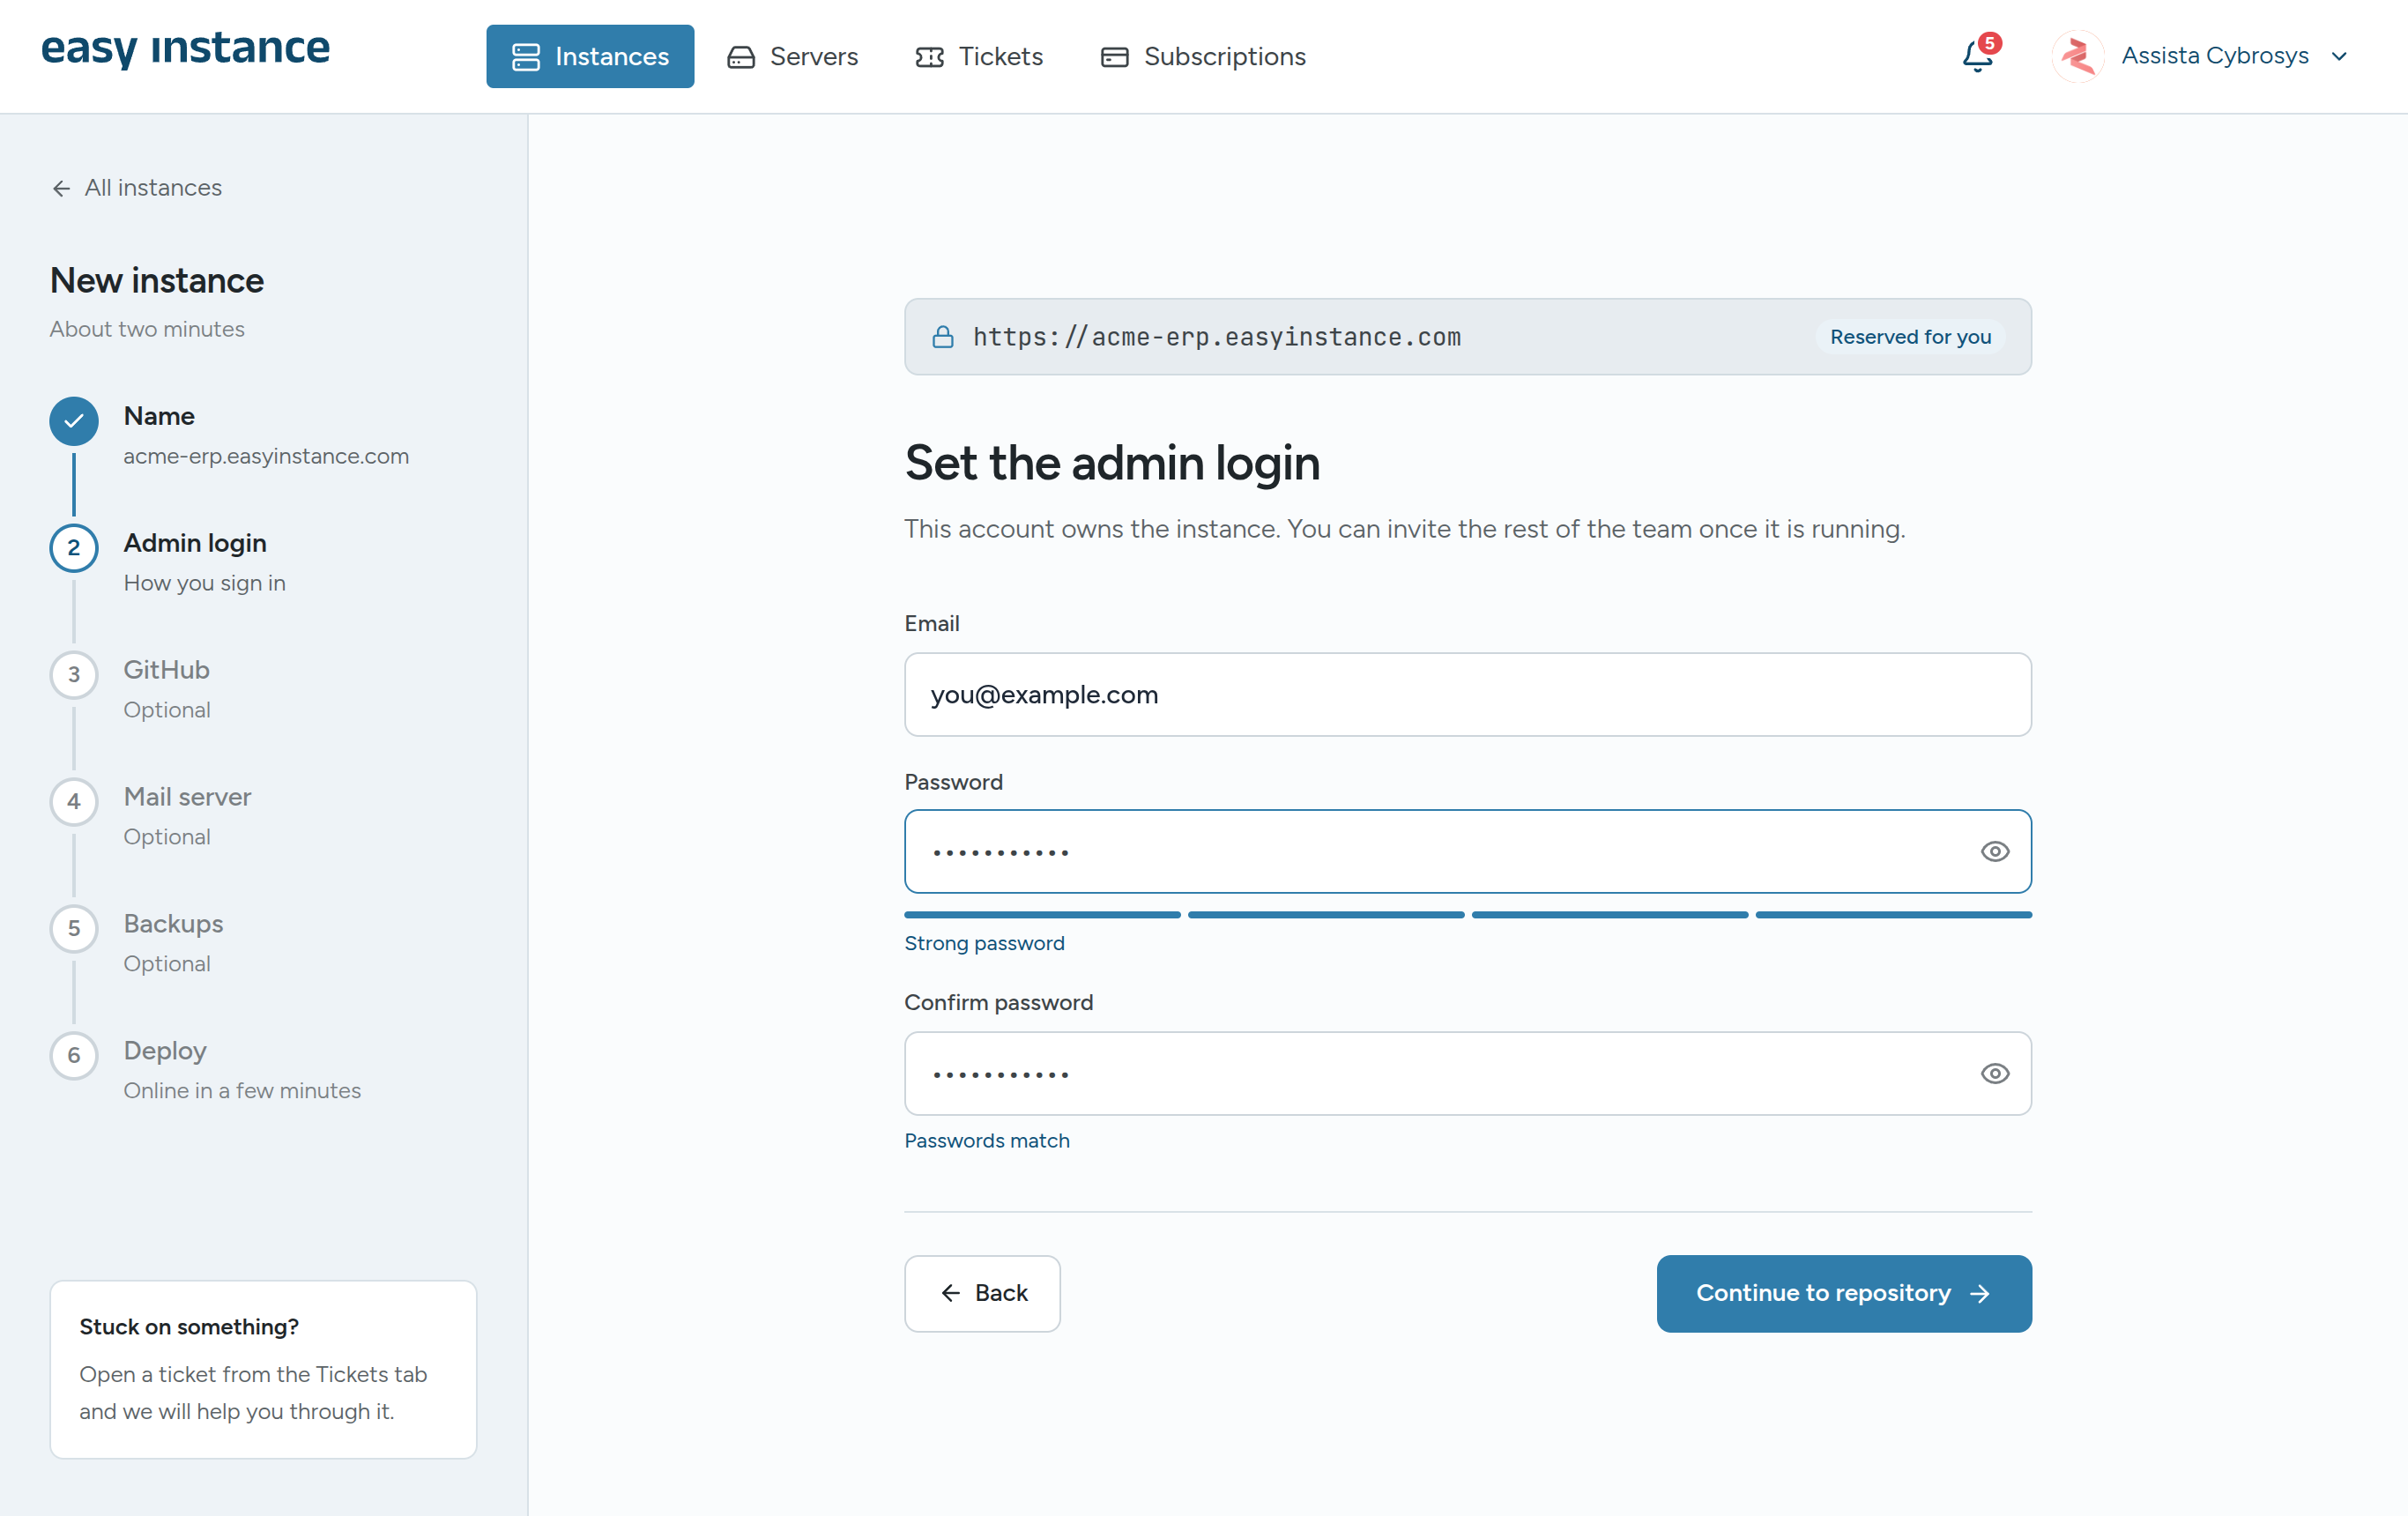
This account owns the instance. You can invite the rest of the team once it is running.
- Check the Email. It starts as your account email.
- Enter a Password and repeat it in Confirm password. Use 8 or more characters, with upper and lower case letters, a number and a symbol. The bar under the field must show Strong password.
- Select Continue to repository.
Step 3: Connect GitHub (Optional)
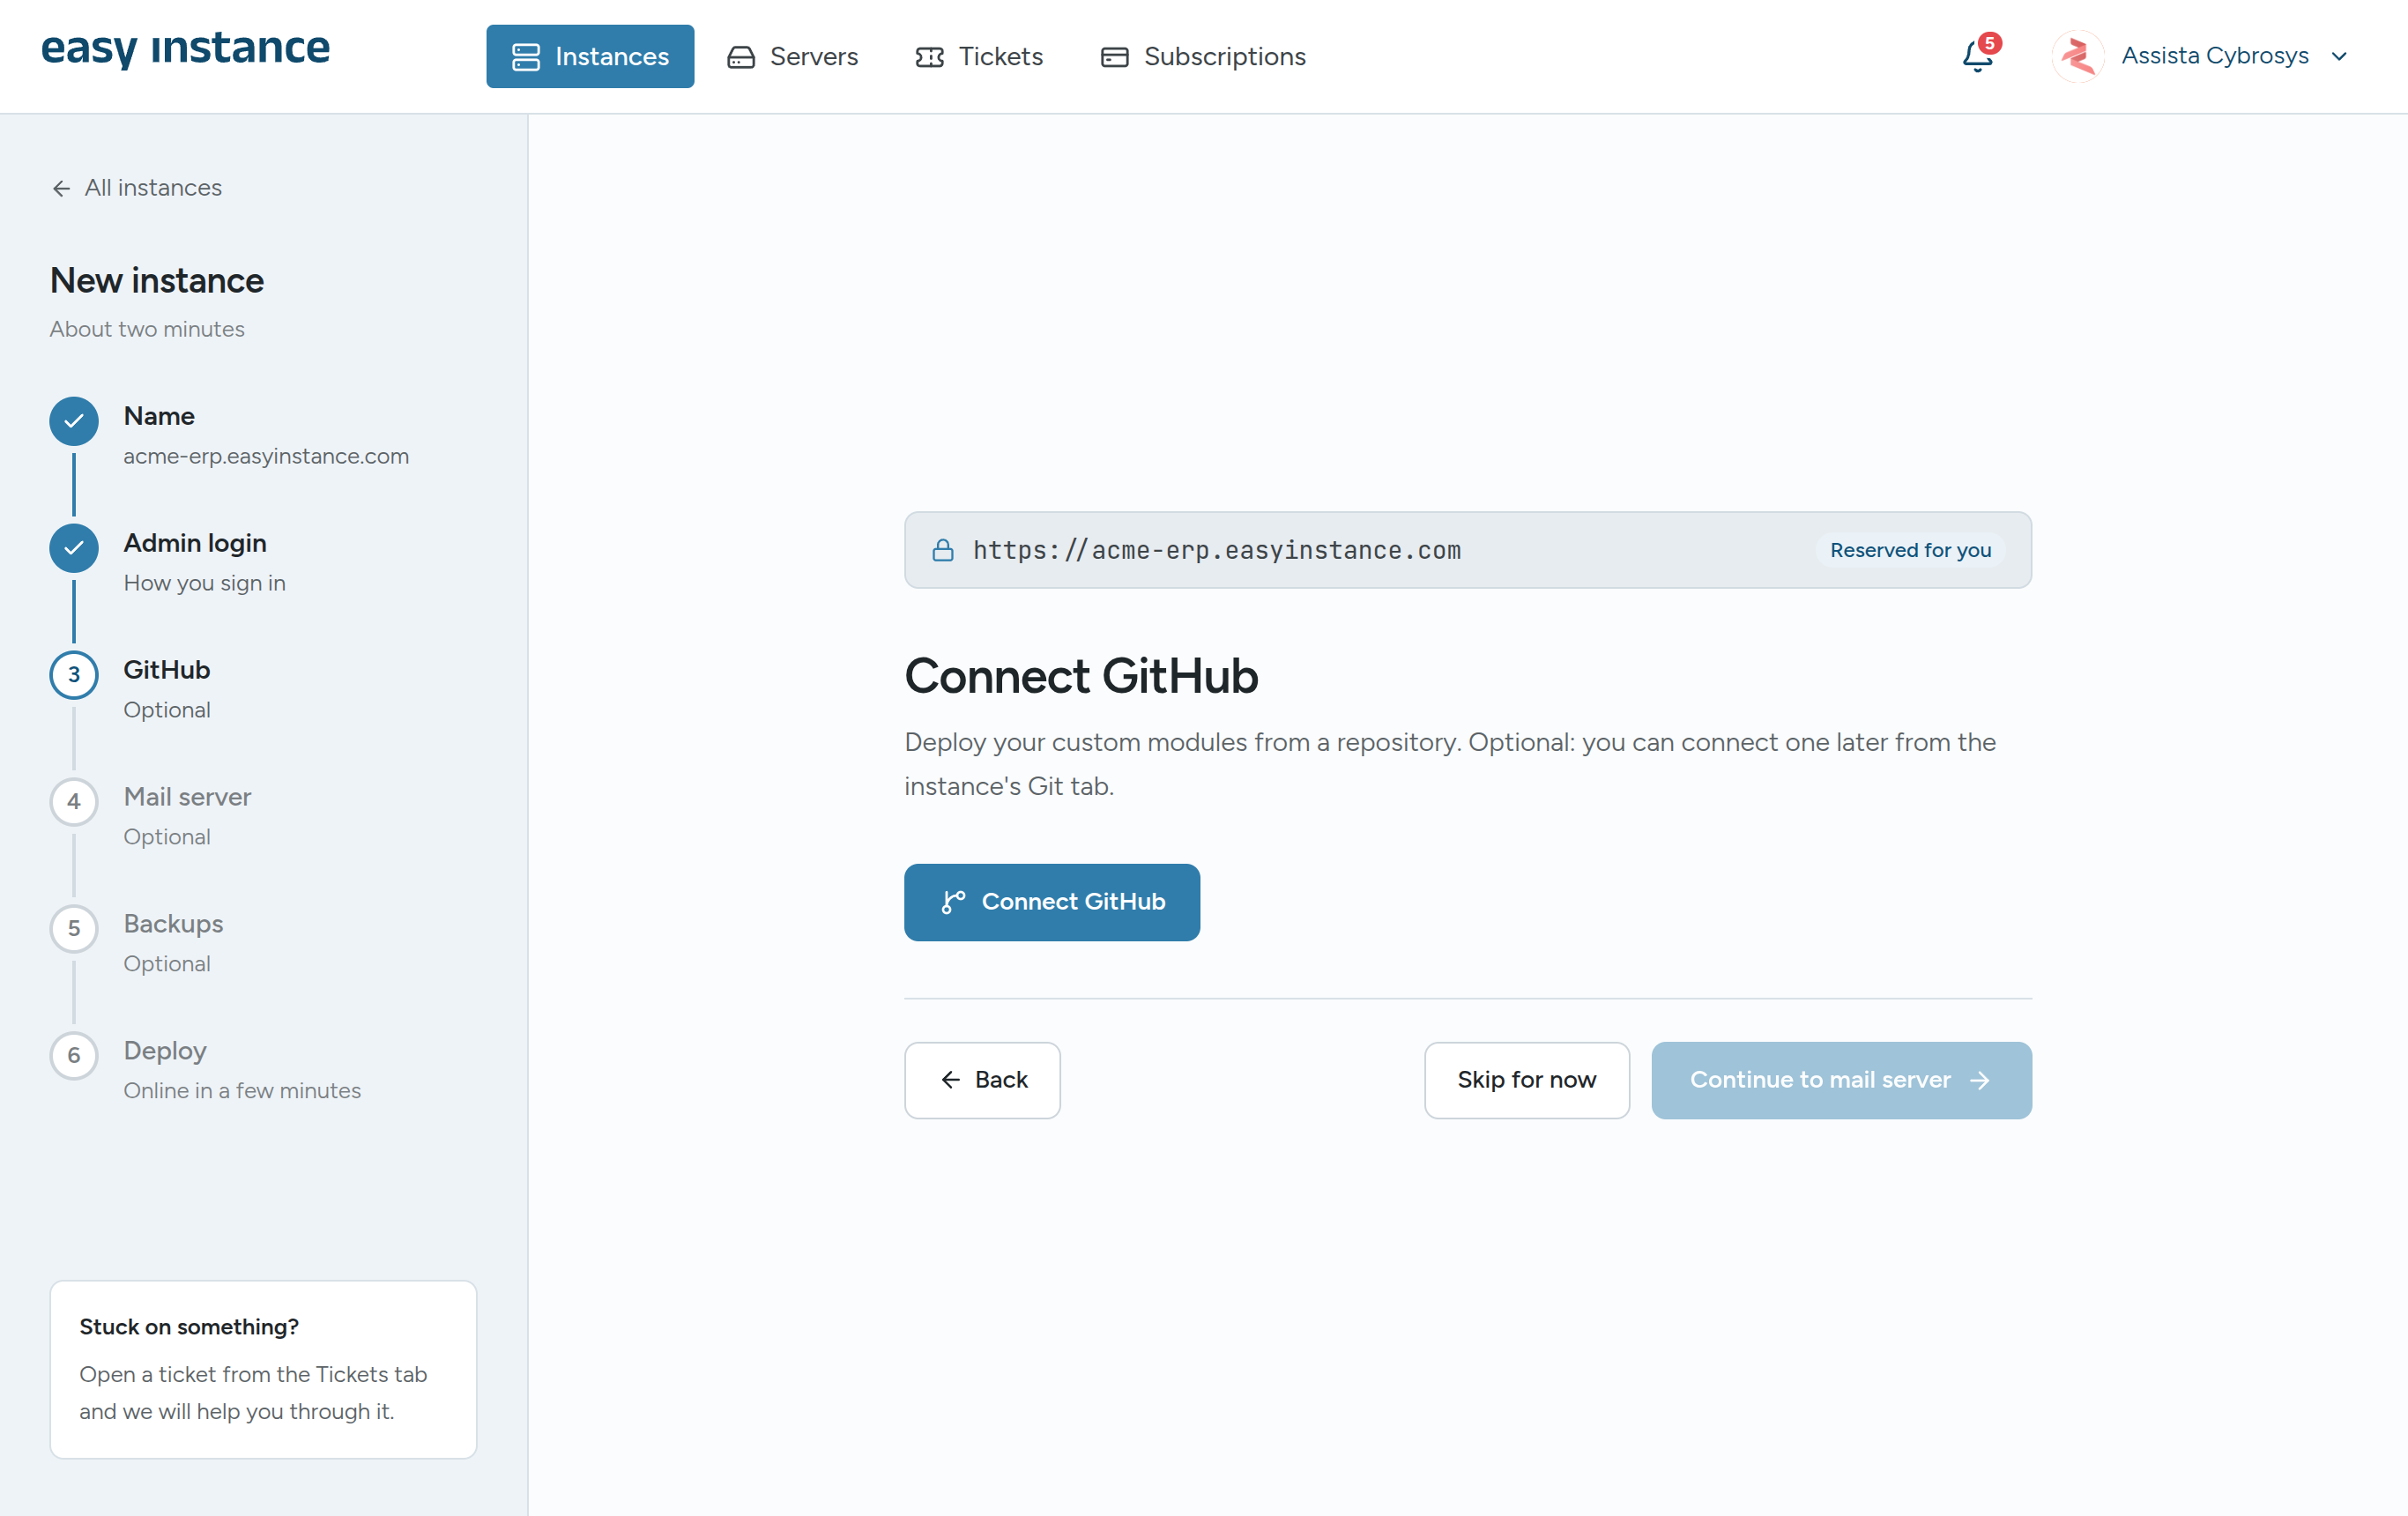
Deploy your custom modules from a repository. Select Connect GitHub, authorize Easy Instance, then pick an existing repository or Create new repository, and a branch.
To do this later, select Skip for now. You can connect a repository at any time from the instance's Git tab. See Git and Custom Modules.
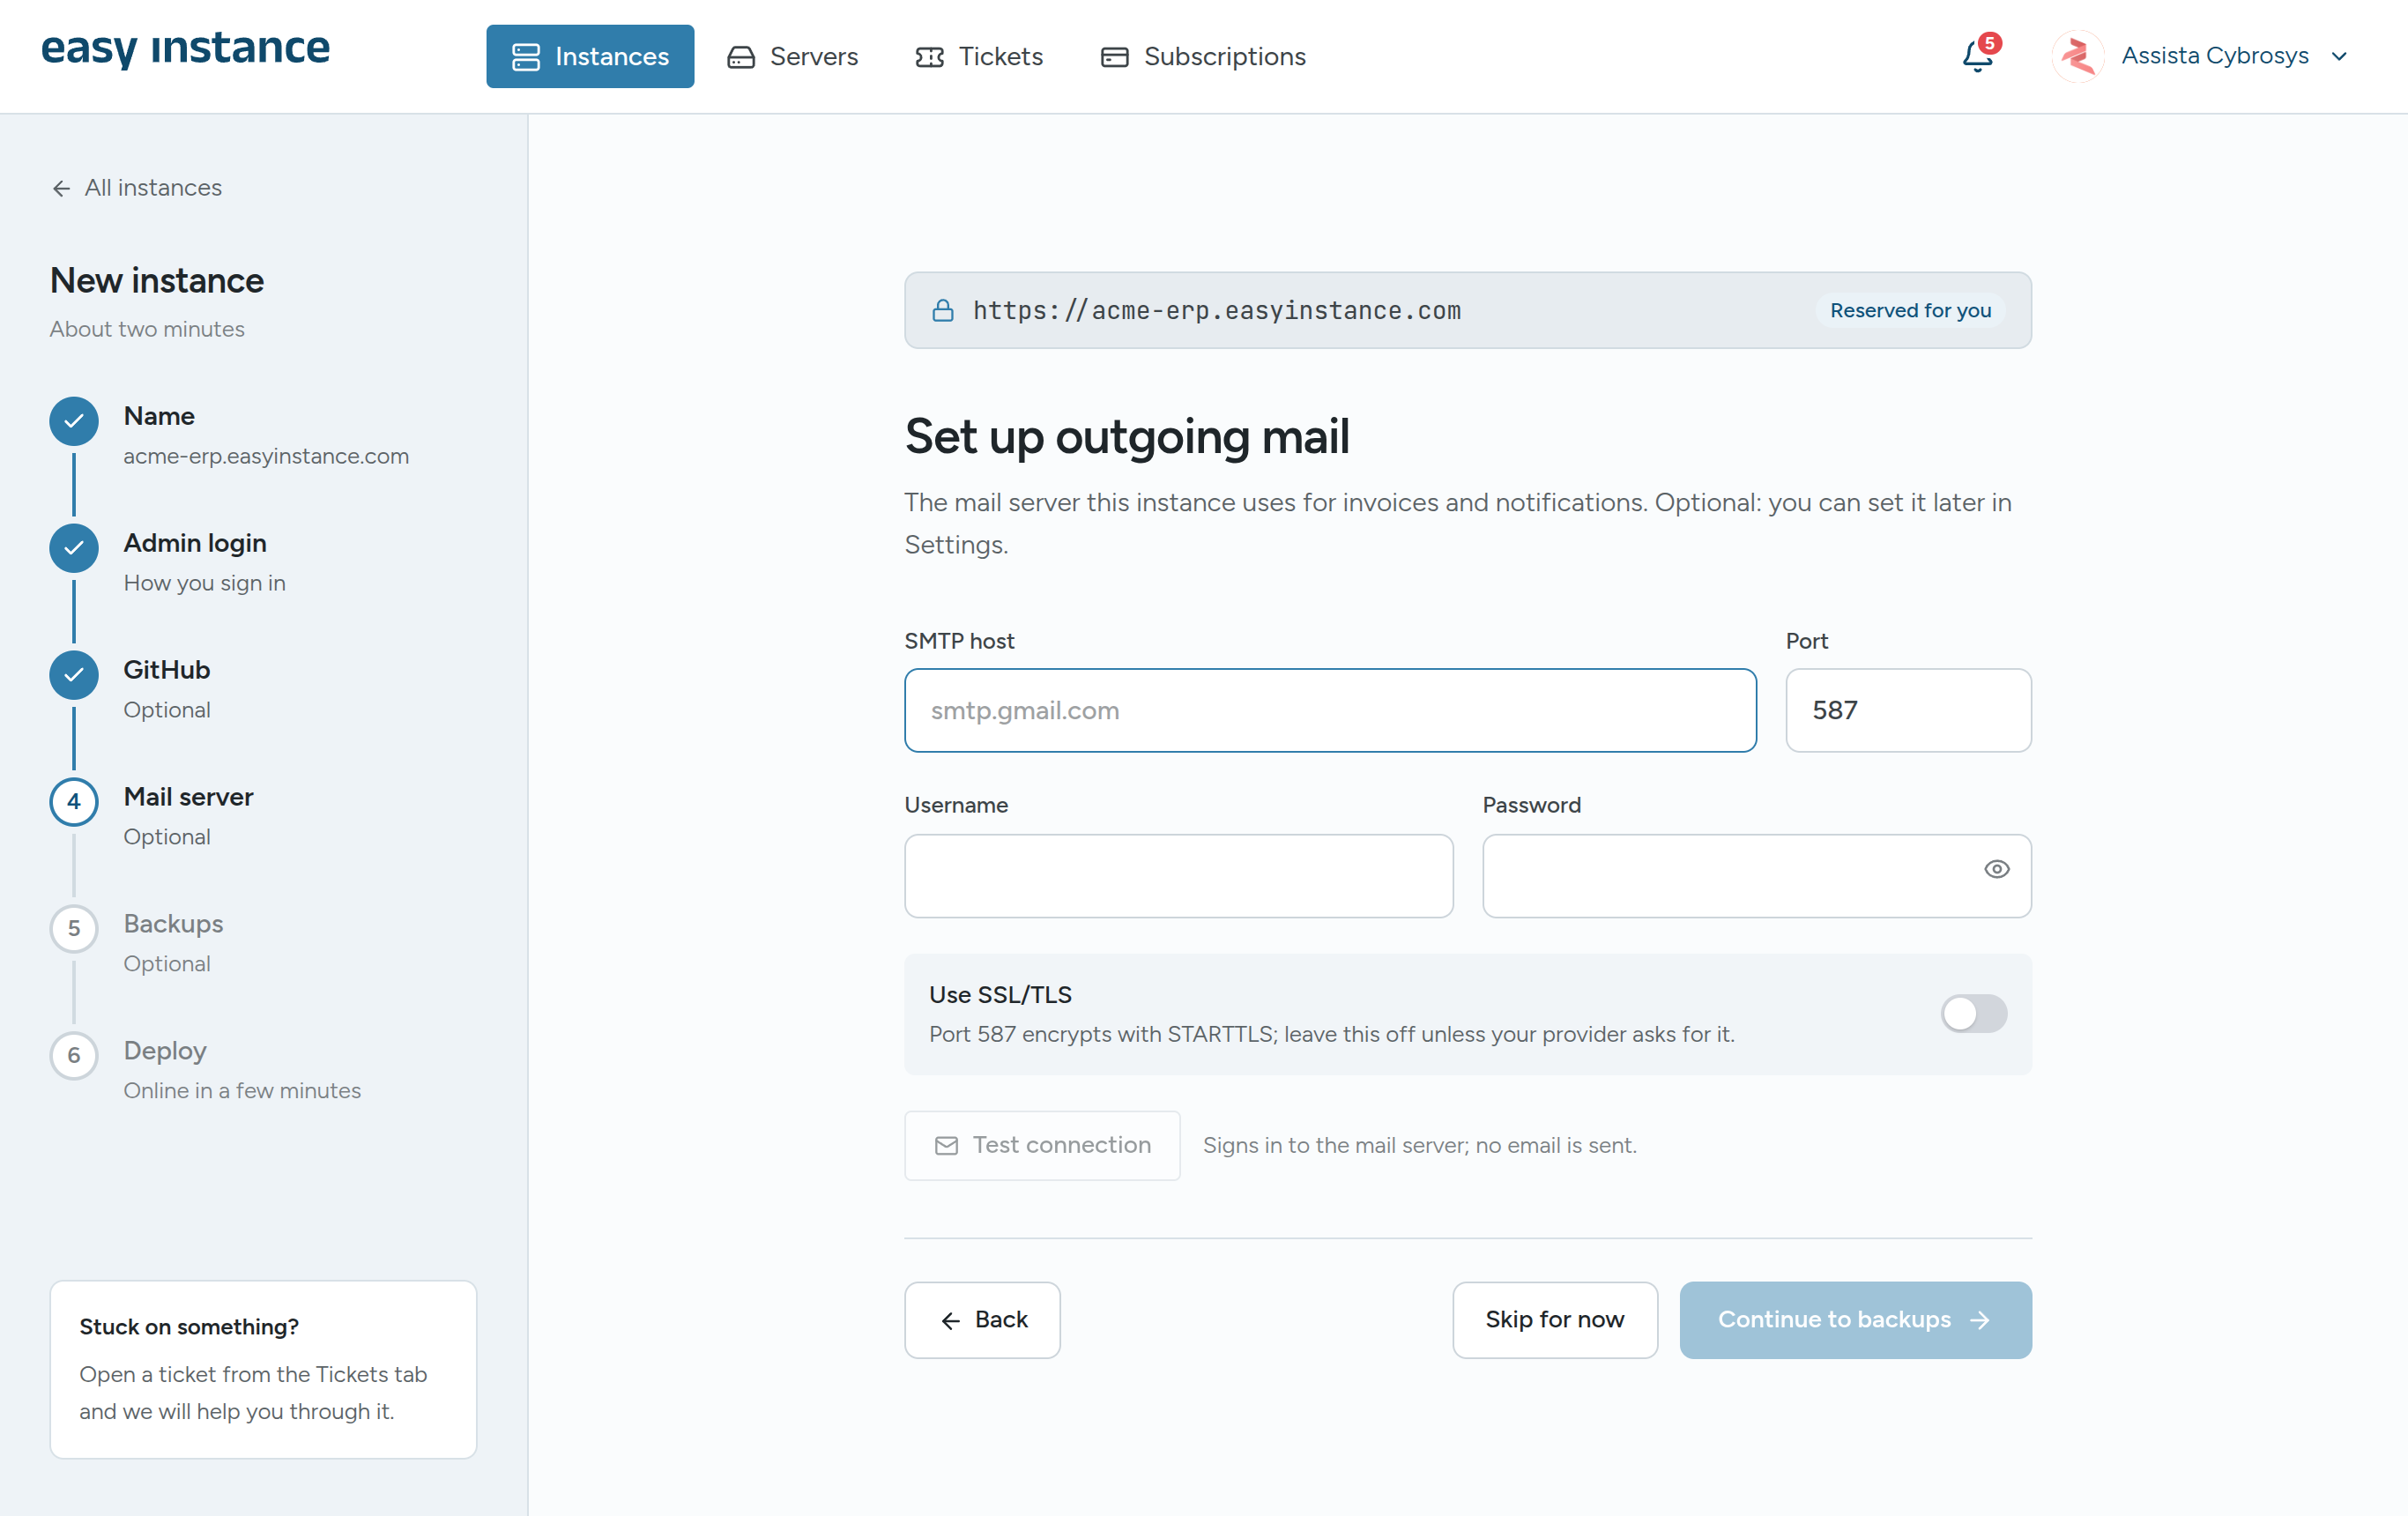
Step 4: Set Up Outgoing Mail (Optional)
The server that sends your Odoo emails, such as invoices and notifications. Your email provider gives you these details.
- Enter the SMTP host, Port (587 by default), Username and Password.
- If you're unsure, keep port 587 and leave Use SSL/TLS off.
- Select Test connection. It signs in to the mail server; no email is sent.
Or select Skip for now and set it later. See Outgoing Mail (SMTP).
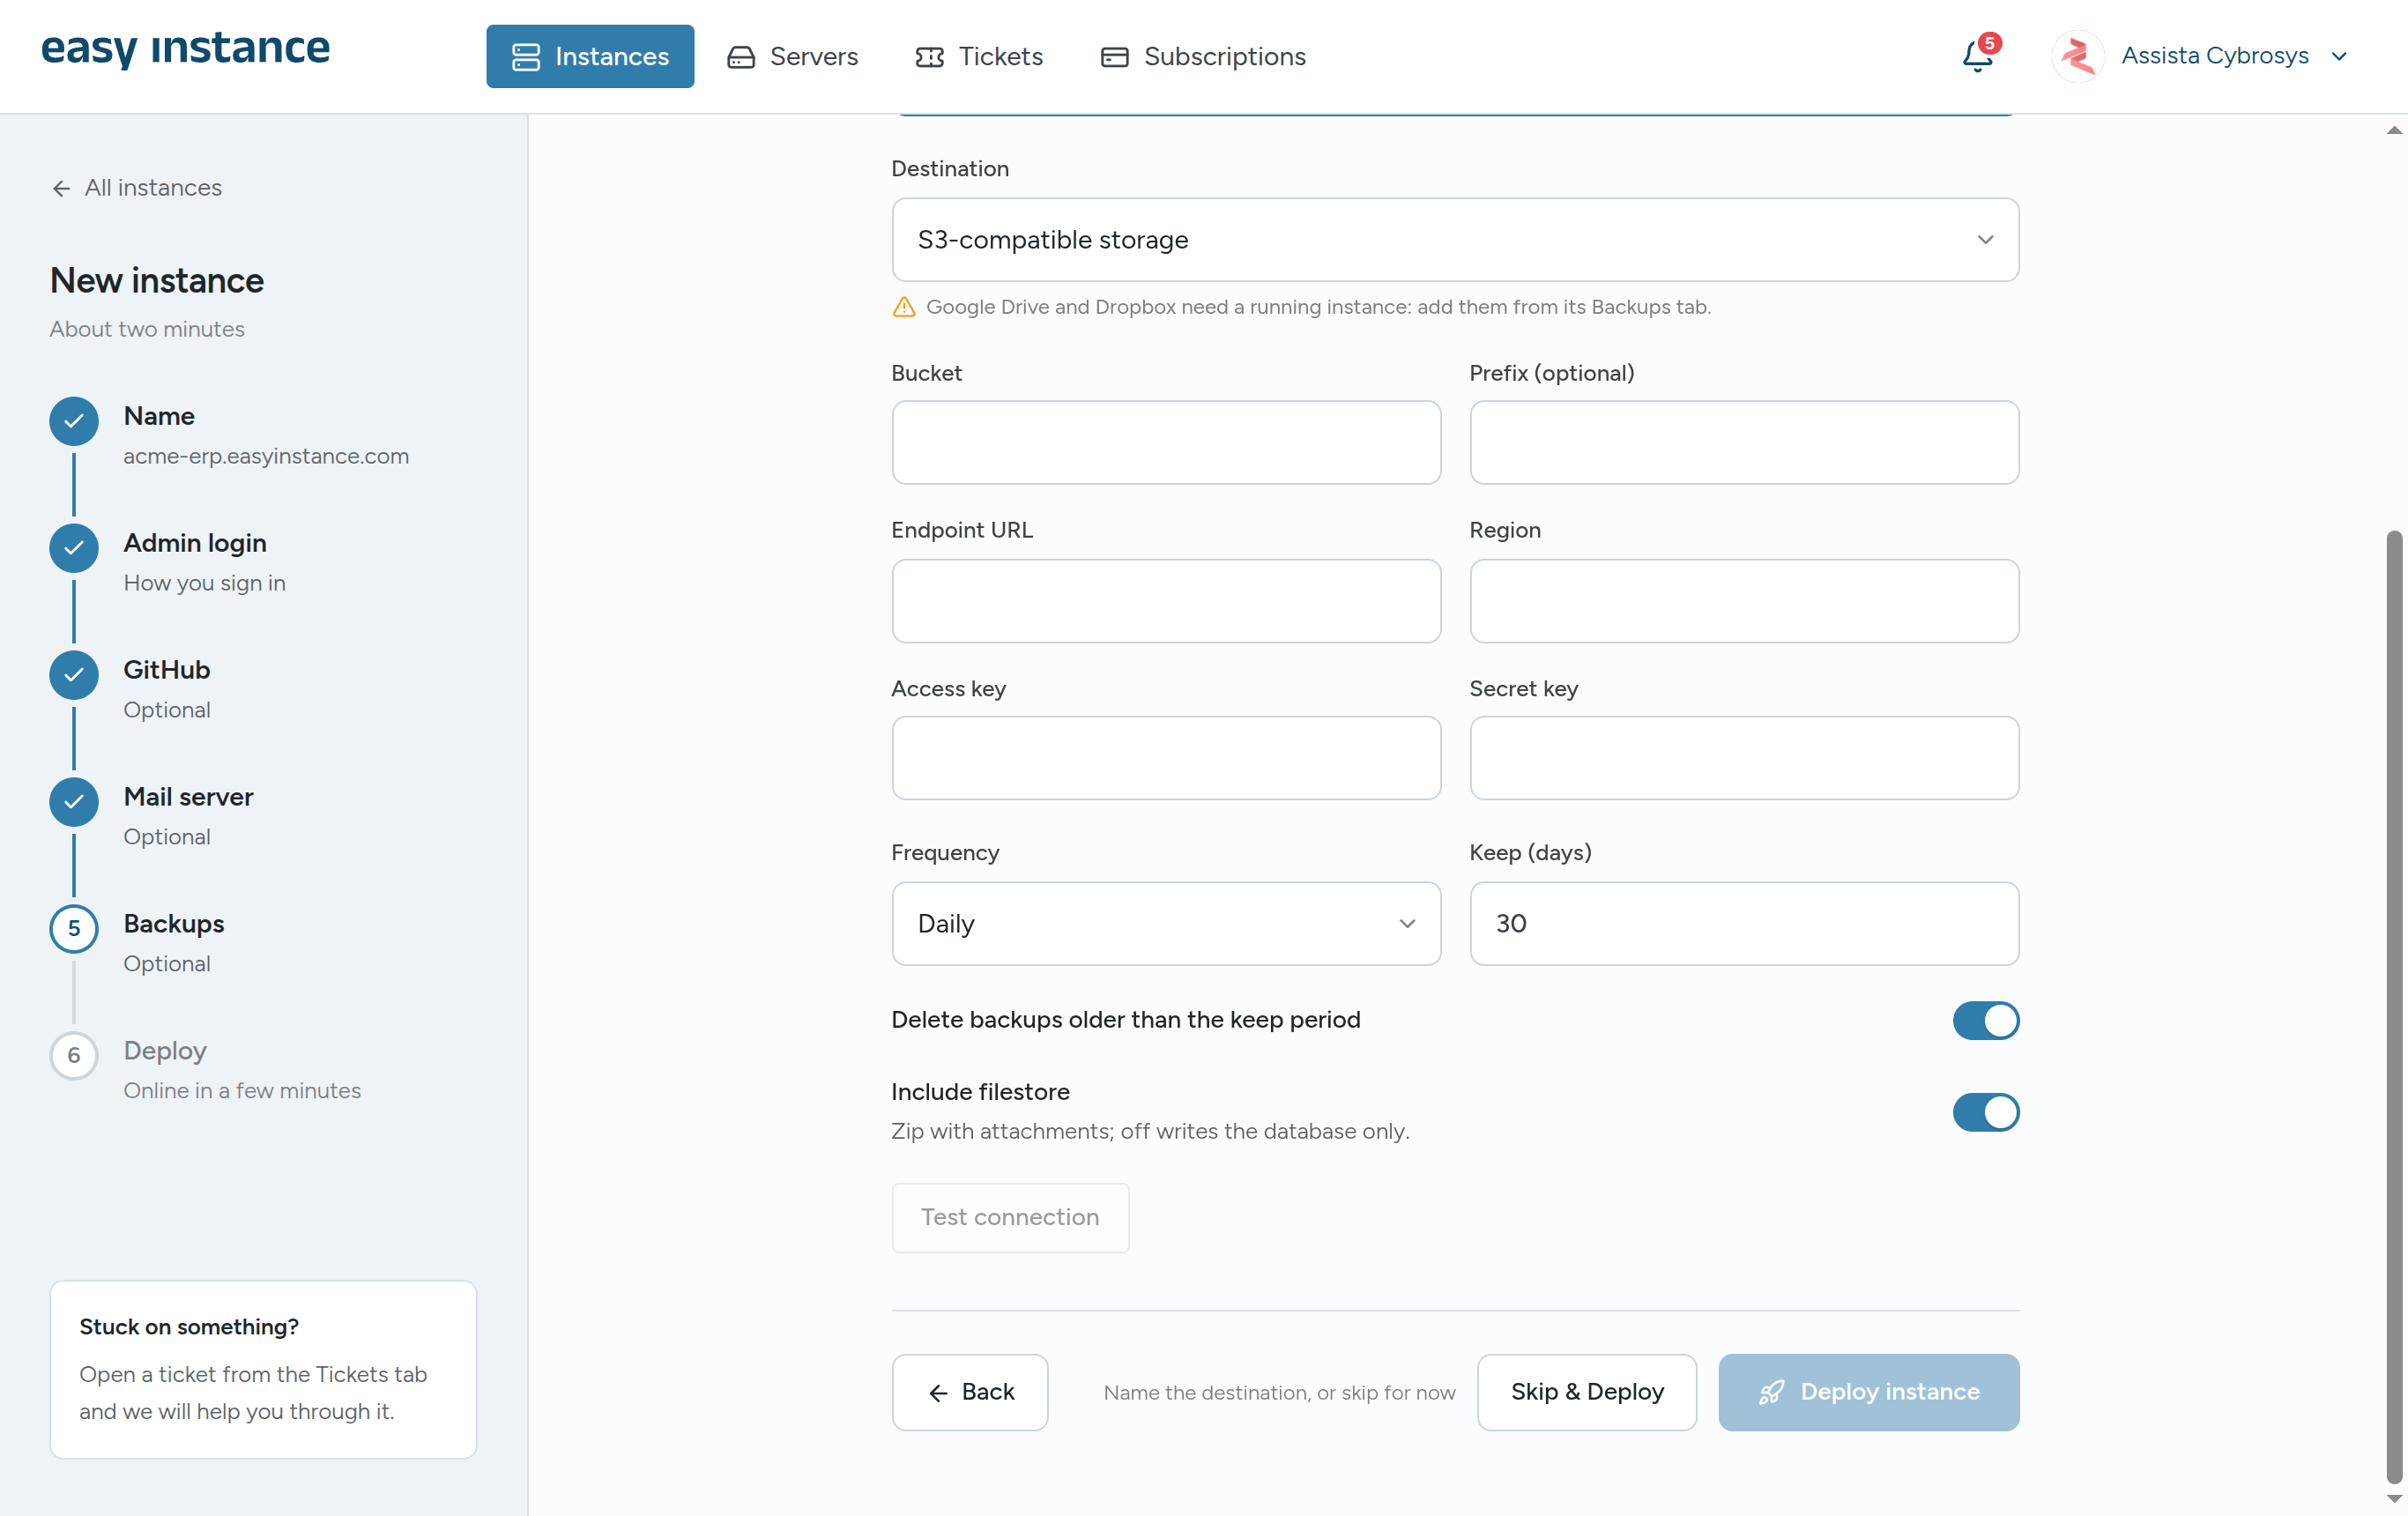
Step 5: Add a Backup Destination (Optional)
Every instance already gets a daily backup on Easy Instance storage. Here you can also send copies to storage you control: S3-compatible storage, FTP, SFTP or Nextcloud.
INFO
Google Drive and Dropbox need a running instance. Add them from the instance's Backups tab after it is deployed.
Fill in the destination, set Frequency and Keep (days), and select Deploy instance. To skip, select Skip & Deploy. See Backups for each destination's fields.
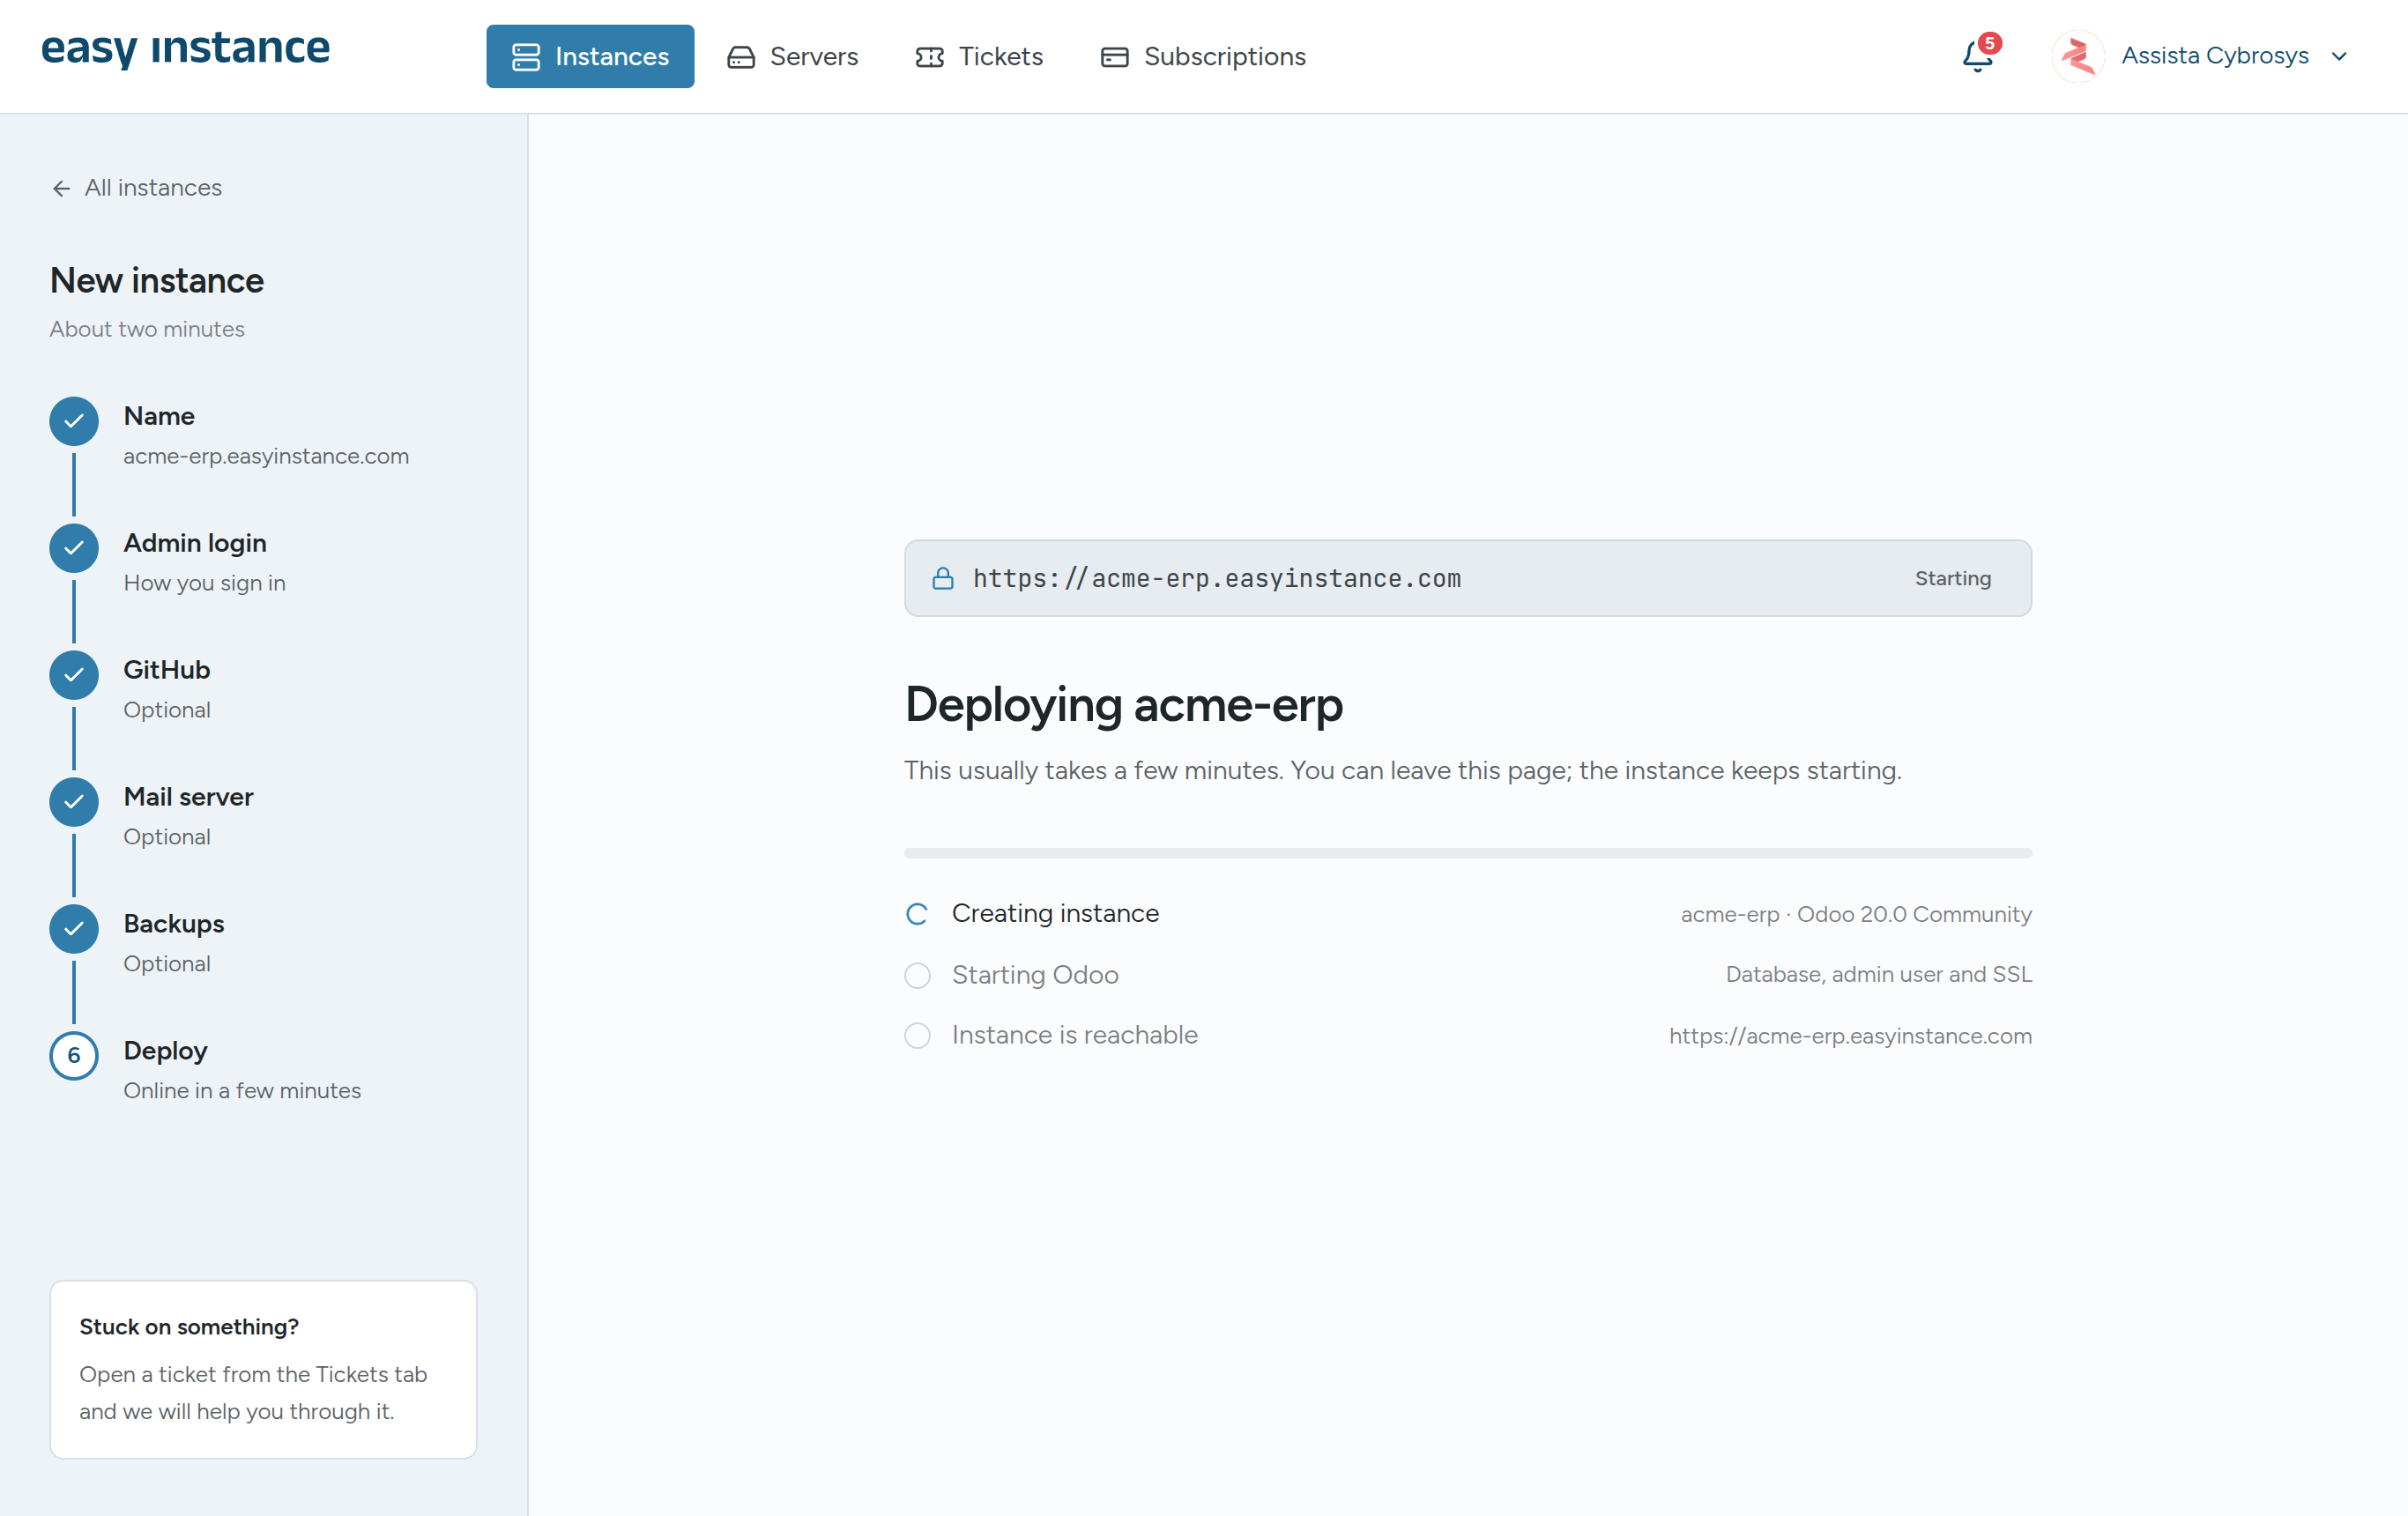
Step 6: Deploy
The wizard shows the progress: Creating instance, Starting Odoo (database, admin user and SSL), then Instance is reachable. You can leave the page; the instance keeps starting.
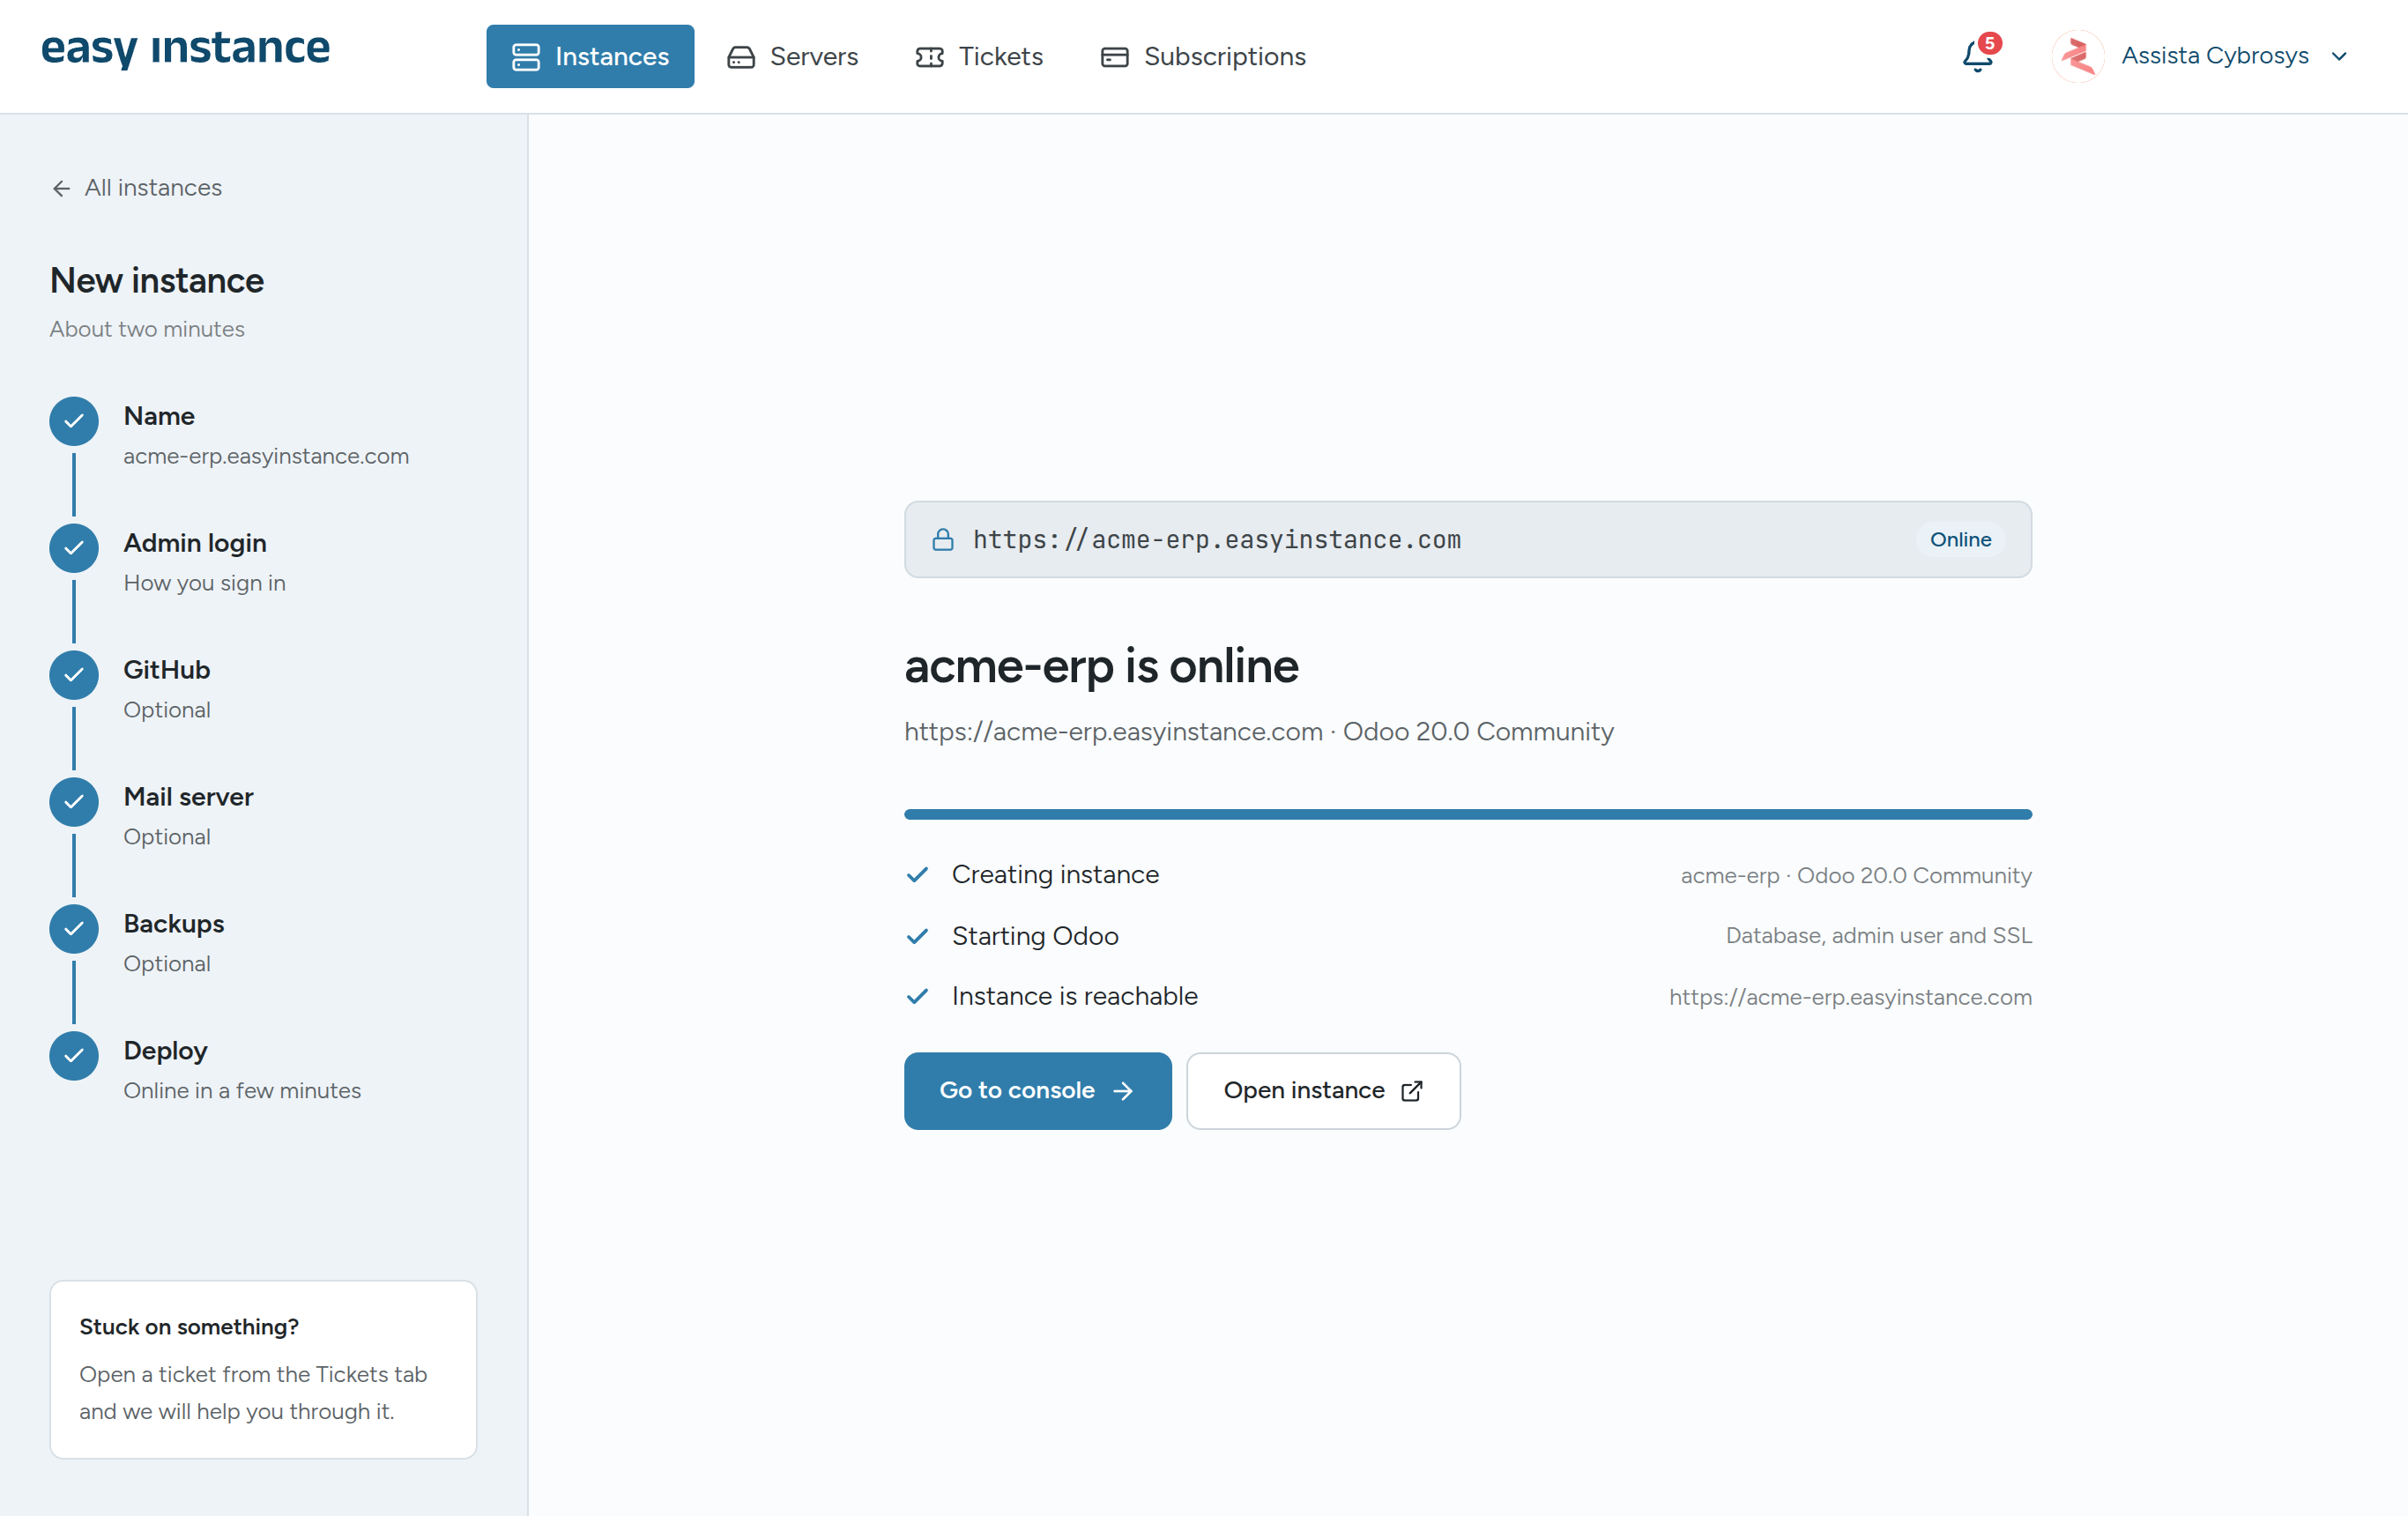
When it is ready, you see is online:
- Go to console opens the instance in the dashboard. See Instance Overview and Actions.
- Open instance opens Odoo in a new tab. Sign in with the admin email and password from step 2.
Leaving the wizard
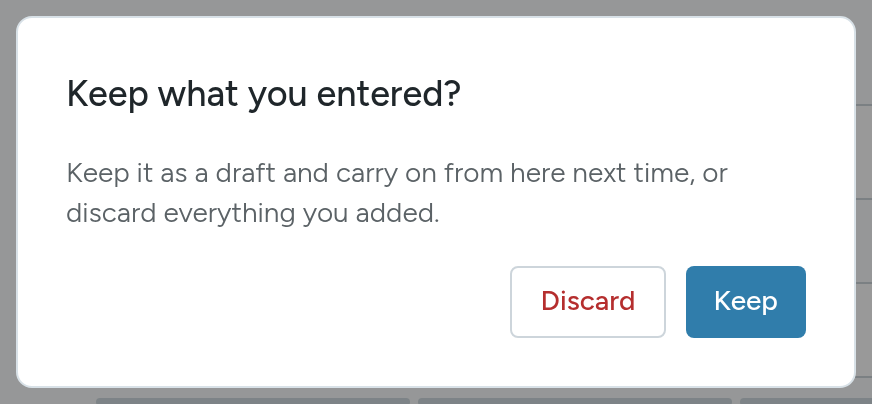
If you leave before deploying, Easy Instance asks Keep what you entered? Choose Keep to save a draft and carry on later, or Discard to start over.
Waiting list
If every instance slot is in use, you can still submit. Your instance joins a waiting list, and you get an email as soon as it is created.